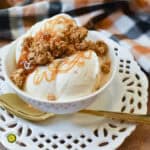
Ninja Creami Apple Cobbler Ice Cream
Servings: 1 Pint
Calories: 657kcal
Ingredients
Ice Cream Base
- ½ Tablespoon Cream Cheese Room temperature
- ½ Teaspoon Vanilla Bean Paste
- 6 Tablespoons Half and Half
- ½ Cup Milk
- ⅔ Cup Apple Pie Filling Canned
Mix-ins
- ½ Cup Granola Topping I used Honey Bunches of Oats, Honey Roasted Granola but any granola will work.
- 1 Tablespoon Caramel Sauce
Instructions
Make the Ice Cream Mixture
- Pour the softened cream cheese, vanilla bean paste, half and half, milk, and apple pie filling into a small blender and blend until all of the ingredients have combined together. Pour the mixture into a Ninja Creami container.
- Freeze on a level surface for 24 hours. Your freezer should be between 9 and -7 degrees Fahrenheit. To avoid getting a bump on the top of the frozen mixture, freeze with the lid off of the container.
Process the Ice Cream
- After 24 hours, remove the pint from the freezer. Remove the lid.
- Place the container into the Ninja Creami and then process on "ICE CREAM."
- If the ice cream is dry or crumbly looking, pour in a tablespoon or two of milk and then re-spin. If the ice cream looks more like dippin dots, (little balls of ice cream), re-spin without adding liquid.
- Dig a well down the center of the ice cream and pour in the granola and caramel sauce. Process on mix-ins.
- Remove the pint from the machine and enjoy!
Video
Notes
Do you need to cook the apples for apple cobbler ice cream?
You do not need to cook the apples since we are using canned apple pie filling for this recipe. If you prefer to use fresh apples, you can cook them with some butter, cinnamon, brown sugar, and a little bit of nutmeg. Just slice and peel your favorite apples (Honeycrisp, Golden Delicious, or Granny Smith apples work well) and cook them for a few minutes over medium heat. You may want to add a little bit of cornstarch to thicken the mixture up.
What makes this recipe apple "cobbler?"
Turning a traditional cobbler into ice cream can be a little tricky because most crust is made of dough which would get soggy when added to ice cream. Instead, I used a granola topping to provide some of the same flavors and textures that you might get from a cobbler without the risk of it getting soggy. This recipe could pass as apple pie ice cream, apple cobbler ice cream, or apple crisp ice cream.
Nutrition
Calories: 657kcal | Carbohydrates: 104g | Protein: 12g | Fat: 24g | Saturated Fat: 11g | Polyunsaturated Fat: 1g | Monounsaturated Fat: 4g | Cholesterol: 53mg | Sodium: 271mg | Potassium: 526mg | Fiber: 5g | Sugar: 57g | Vitamin A: 669IU | Vitamin C: 4mg | Calcium: 290mg | Iron: 4mg
