
The second that the new NINJA FOODI DELUXE came out, I immediately bought it! I’m not exaggerating! I signed up for email notifications for the minute that it was available on the Ninja website. I ordered it the day that it came out and was so incredibly excited to get it in the mail 2 days later! Why was I excited? Well, there’s the updated look of the unit, but there’s also the fact that it has a YOGURT button!!!! What? Yes!!!!!!
Jump to:

So, I don’t eat a lot of yogurt, but my family does so I figured this was a pretty good excuse to get a new NINJA FOODI!! 🙂
I was so excited to get to work on my very first homemade yogurt that I didn’t do a lot of research……..and I paid deeply for that mistake! But, lucky for you, I’m sharing all of my mistakes with you so that you don’t make the same ones!
Take 1: My first attempt at making yogurt!!
- I was so excited to make yogurt that I didn’t spend enough time looking through the user manual of my new NINJA FOODI DELUXE!! OOOOPS! So, I ended up slow cooking milk for roughly 12 hours. I don’t recommend this to anyone. The final result was a liquid brown smelly goo. I did not have any yogurt!!!
- I made the mistake of stopping on the function that says slow cook/yogurt. I didn’t realize that I needed to go one more notch to actually get to the yogurt function. Instead, I ended up waiting for the milk to boil for roughly 5 hours before going to bed for the night. The cookbook that comes with the Ninja Foodi said that it could take several hours for the milk to boil. Yes, 5 hours seemed like a long time. I spent some time online looking to see how long it should take and I came up with nothing. So, I let it keep going……for hours and hours.
- When I woke up in the morning, the screen still had not changed. So, I opened up the lid…and there it was……my boiled milk. Gross. I poured it down the drain and decided to start again.


Take 2: Do Over!!
- Thank goodness I bought an entire gallon of milk for try number one. I had only used half of the gallon so I didn’t need to go to the grocery store for more supplies. This round, I actually pushed the turned the dial until it said “yogurt!!” I know- it seems so easy! I don’t know how I missed this the first time.
- I used the same milk, yogurt starter, vanilla and honey. I followed the same exact steps. The only difference is that the screen actually changed to show “boil, “”add and stir,” and “incubate!” We are making progress!! The boiling portion did not take 5 hours this time. To my amazement, it boiled in less than an hour! Yippeee!!! We are going to have real yogurt this time!!! Finally, the beep went off and it was time to see my beautiful, thick, yogurt. And then it happened! I opened the lid and I had yogurt soup! What the heck!!!???
- Ok, so- lesson learned. DO NOT ADD HONEY while the yogurt is cooking! Why you ask? Apparently honey has something in it that reacts with the active yogurt cultures that prevents the yogurt from fully forming. Once again- I should have researched this before making it. Lucky for you, I made this mistake so that you don’t have to.
- To try and get the yogurt a little thicker, I put it in the refrigerator overnight. It did get a little thicker but was still more like drinkable yogurt and less like regular yogurt. Once we got past the consistency (similar to white glue lol), the flavor was actually pretty good. We were moving in the right direction!!


Take 3: Third time’s a charm!!
- Ok, so I ran out of milk and yogurt starter so I needed to go to the store to get more supplies. I bought different milk and yogurt. I figured at this point it couldn’t hurt. I bought the highest fat % yogurt that I could find. 5%! That’s got to do something right!?!
- At this point, I was determined to make actual yogurt! I used the actual yogurt function and skipped the honey and vanilla. Needless to say, my family had lost faith in my yogurt making abilities but I was determined to get it right! To my amazement, it worked!!! I ended up with thick, beautiful yogurt!!! Directions and recipe below to accomplish Take 3 yogurt….I’ll spare you all of the details on Take 1 and Take 2!


Tips for making Ninja Foodi Yogurt:
Do not add honey to the yogurt until you have completed the incubation period and have refrigerated the yogurt for a couple of hours.
Be sure that you are actually using the “yogurt” function and not the “slow cook” option.
Be patient! If the yogurt does not set up quite as much as you would like, continue to incubate it longer. You can continue to incubate before you reach the refrigeration step.
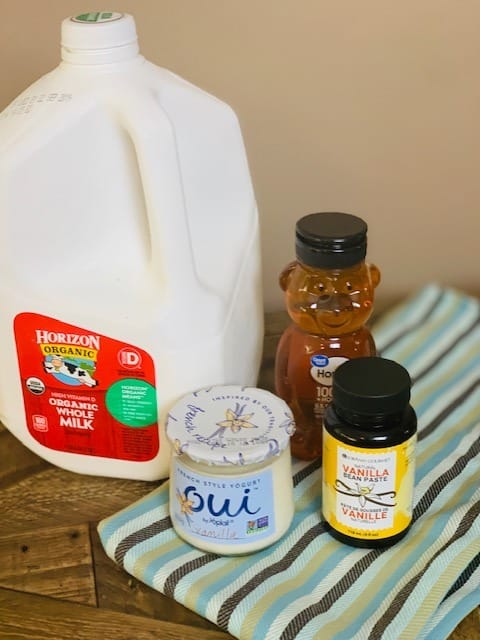
Ingredient tips and substitutions for making Ninja Foodi Yogurt
The full ingredient list is at the bottom of this post in the recipe card.

- ½ Gallon of whole milk- Ultra-pasteurized worked best for me
- 2 Tablespoons of yogurt- it must have active yogurt cultures
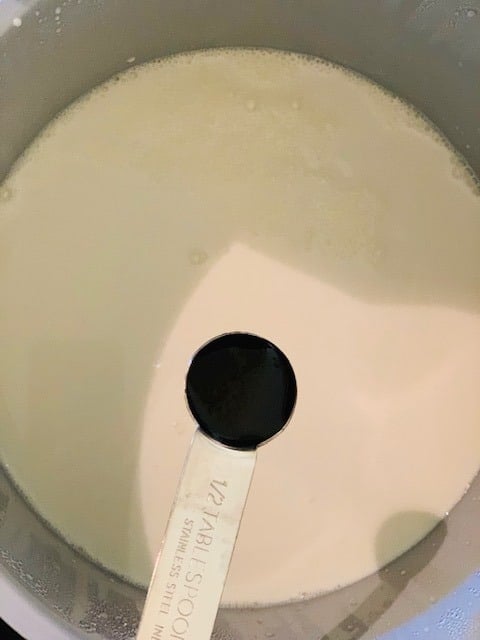
- 1 Tablespoon of vanilla extract or vanilla bean paste
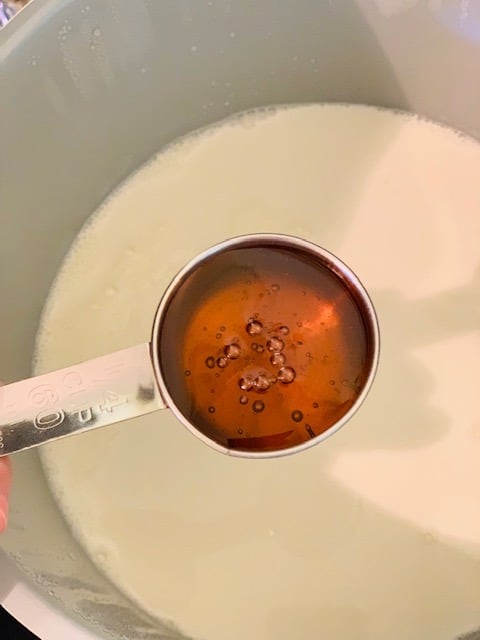
- ½ Cup of honey
Directions for Making Ninja Foodi Yogurt:
- Turn the Ninja Foodi Deluxe “on.”
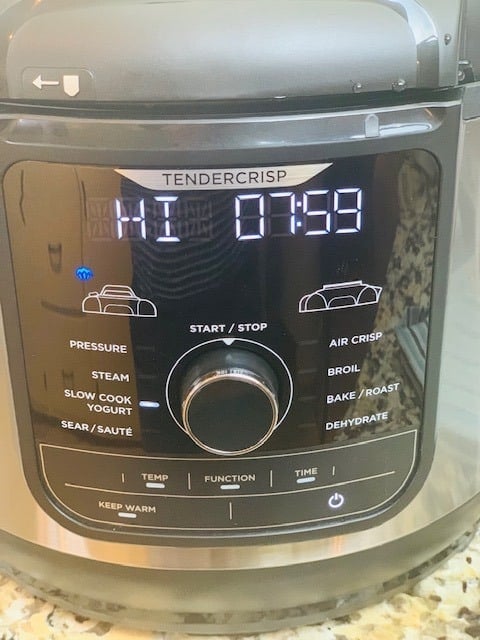
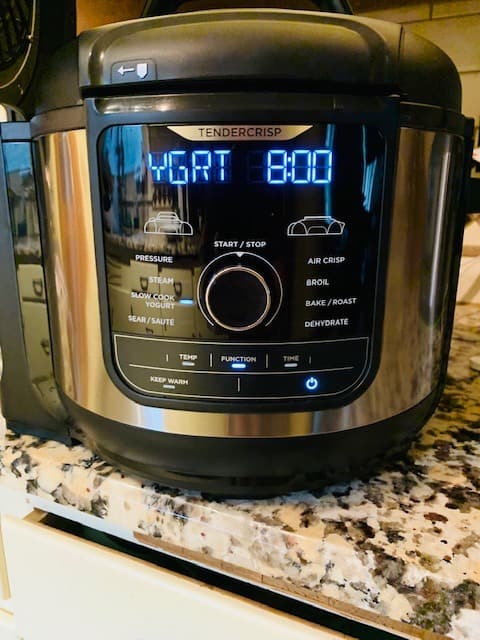
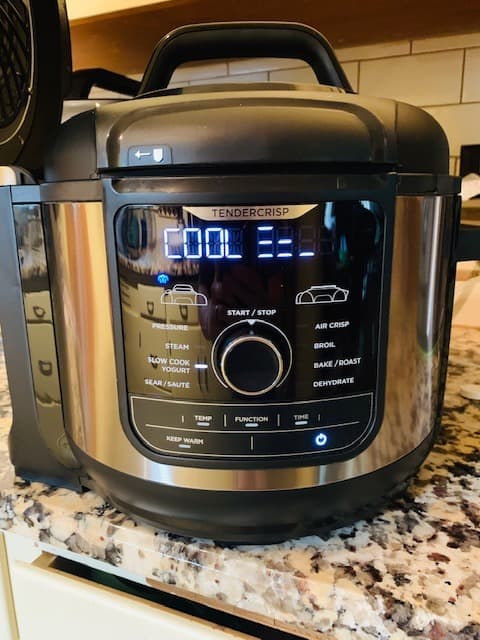
- Choose the “yogurt” function. (Be sure that the screen says yogurt and not “hi.”)
- Pour in ½ gallon of milk. Do not add in yogurt, flavors or sweeteners. Only the milk should be added in this step.
- Close the “pressure cooker” lid and move valve to “vent.”
- Push the start button. The screen should say “yogurt” and be set to a time of 8:00.
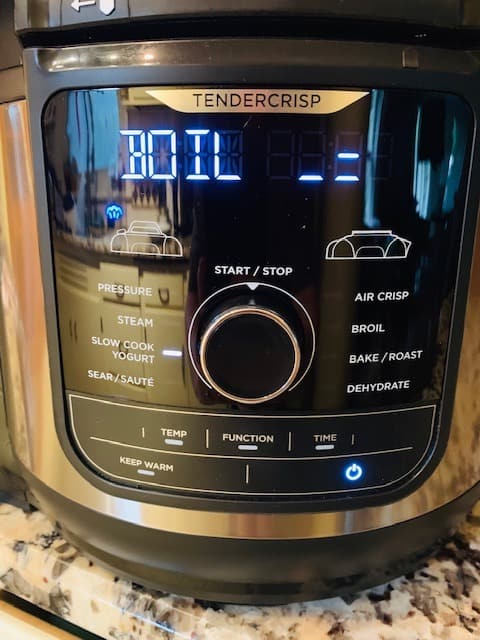
- Milk will boil in the pot during the initial cooking time. Once the milk has reached a boil, the Ninja Foodi Deluxe will beep and the screen will say “boil” on it. This step should take about an hour.
- After the milk has boiled, it will need to cool. The Ninja Foodi Deluxe will automatically change to the “cool” mode. The milk will cool for about an hour or so. Don’t panic if it does take longer.
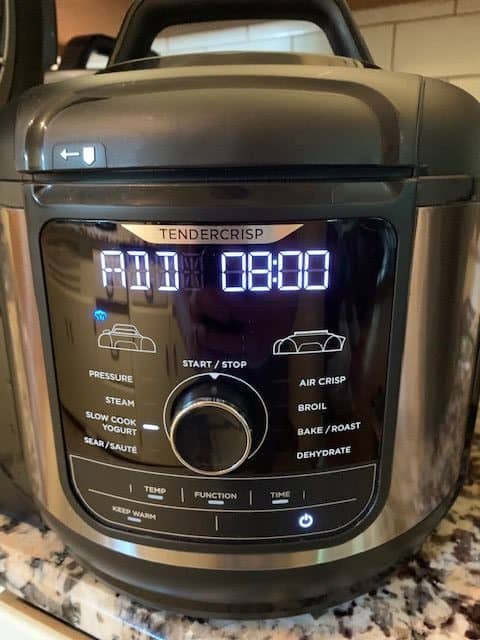
- Once the milk has cooled, the Ninja Foodi Deluxe will beep and the screen will say “add and stir.” When this happens, open the “pressure cooker” lid.
- Add in 2 tablespoons of yogurt (the yogurt must have active yogurt cultures).
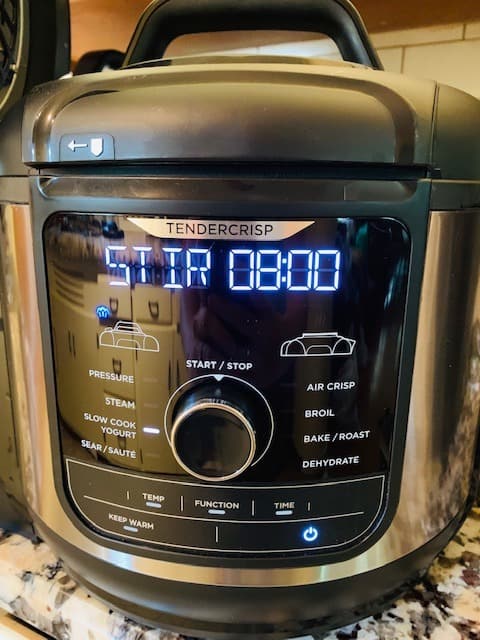
- Whisk the milk and yogurt together with a plastic or silicone whisk. Do not use a metal whisk as this will scrape the pot.
- Replace the “pressure cooker” lid and make sure valve is set to “vent” position.
- Push start button again to get the Ninja Foodi Deluxe going again.
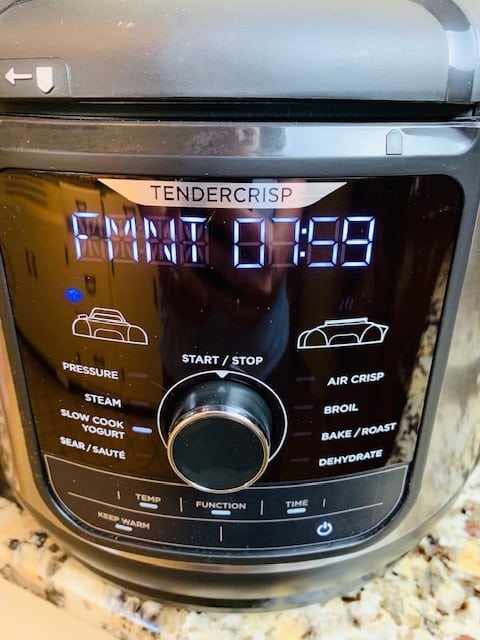
- The screen should now say “incubate” and be set to 8 hours.
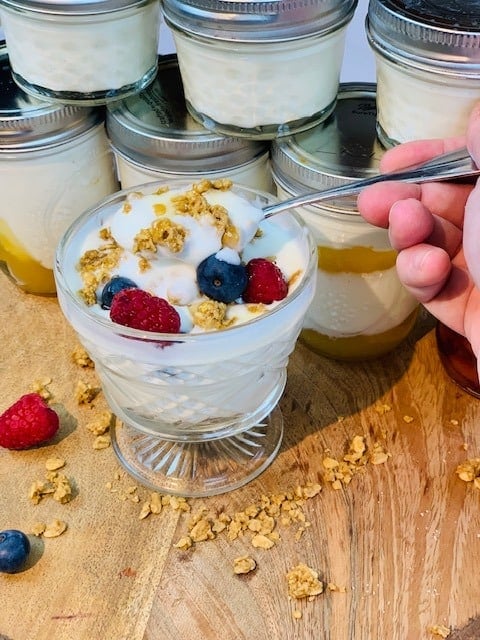
- Let the yogurt incubate. When the timer beeps, remove the lid and check to make sure that the yogurt has set up. You can do so by stick a spoon in the middle of the yogurt. The spoon should stand up on it’s own.
- Refrigerate yogurt for at least 4 hours.
- Add in honey and vanilla extract or vanilla bean paste. Stir until well combined.
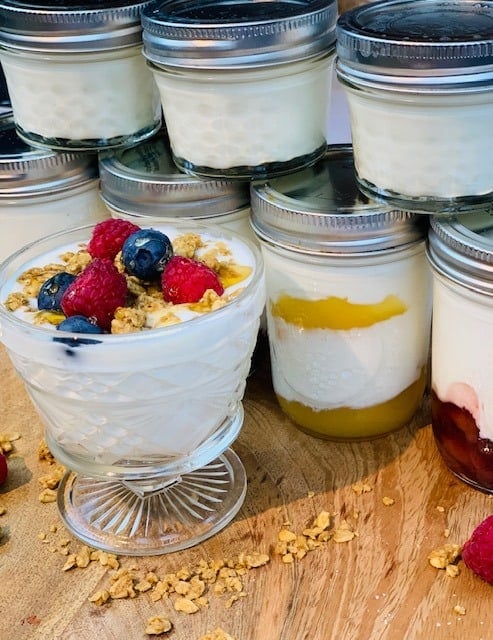
- Place into mason jars or whatever food storage containers you prefer.
Recipe

Ninja Foodi Vanilla Yogurt
Rate this Recipe Print Recipe Pin RecipeEquipment
Ingredients
- ½ gallon Milk (Ultra Pasteurized)
- 2 tablespoon Yogurt (Plain with active yogurt cultures- Any brand will do but the Fage 5% plain Greek yogurt worked for me!)
- 1 tablespoon Vanilla Extract (I used vanilla bean paste! :))
- ½ cup Honey
Instructions
- Turn the Ninja Foodi Deluxe "on."Choose the "yogurt" function. (Be sure that the screen says yogurt and not "hi.")
- Pour in ½ gallon of milk. Do not add in yogurt, flavors or sweeteners. Only the milk should be added in this step.
- Close the "pressure cooker" lid and move valve to "vent."
- Push the start button. The screen should say "yogurt" and be set to a time of 8:00.
- Milk will boil in the pot during the initial cooking time. Once the milk has reached a boil, the Ninja Foodi Deluxe will beep and the screen will say "boil" on it. This step should take about an hour.
- After the milk has boiled, it will need to cool. The Ninja Foodi Deluxe will automatically change to the "cool" mode. The milk will cool for about an hour or so. Don't panic if it does take longer.
- Once the milk has cooled, the Ninja Foodi Deluxe will beep and the screen will say "add and stir." When this happens, open the "pressure cooker" lid.Add in 2 tablespoons of yogurt (the yogurt must have active yogurt cultures).
- Whisk the milk and yogurt together with a plastic or silicone whisk. Do not use a metal whisk as this will scrape the pot.
- Replace the "pressure cooker" lid and make sure valve is set to "vent" position.
- Push start button again to get the Ninja Foodi Deluxe going again.
- The screen should now say "incubate" and be set to 8 hours.Let the yogurt incubate. When the timer beeps, remove the lid and check to make sure that the yogurt has set up. You can do so by stick a spoon in the middle of the yogurt. The spoon should stand up on it's own.
- Refrigerate yogurt for at least 4 hours.
- Add in honey and vanilla extract or vanilla bean paste. Stir until well combined.
- Place into mason jars or whatever food storage containers you prefer.
Notes
- Do not add honey to the yogurt until you have completed the incubation period and have refrigerated the yogurt for a couple of hours.
- Be sure that you are actually using the “yogurt” function and not the “slow cook” option.
- Be patient! If the yogurt does not set up quite as much as you would like, continue to incubate it longer. You can continue to incubate before you reach the refrigeration step.
Nutrition
Nutrition information is provided as a courtesy and is an estimate only.


John says
How do you bypass the “boil”/“Hi” mode. I would much rather sauté my milk on medium to 181’ then cook quickly in the sink in some cold water to 110’ then put it back in the foodie and ferment for 7-8hours. Unfortunately, my foodie won’t let me bypass the boil(Hi) mode and go straight to ferment. So I am covering the pot w foil after; heating, cooling and adding live cultures. Then putting regular lid down and putting things on dehydrate at 180’ for 7.5 hours. We’ll see how it turns out. Taking several hours to boil then cool is a complete waste of time if you have a thermometer.
TheTastyTravelers says
Hi John- I have not tried to bypass the boil cycle in the yogurt function so I can’t offer any advice here. How did it turn out?
James says
You can get to the ferment stage by pressing the ‘temp’ button when you first get to the yoghurt setting. Found this out because my Foodi sat on ‘cool’ for nearly 4 hours, so I had to go through the process manually.
Jennifer says
Life saver info James! Thank you!
Chris says
Thank you for the info James!! I opened my Ninja to help cool the milk down. I used a thermometer and the Ninja didn’t stop at 110’. I never would have known how to bypass boil!
Cindy Hepper says
Hello! My Foodi has been on “cool” mode for quite awhile now. Does it flash “Add and Stir” until you actually add in your starter yogurt, honey and vanilla or is it a quick flash and if you’re not standing right in front of it- you could miss it?? Thanks for the help!
Lisa says
I noticed a Ferment mode when I toggled past Yogurt, hope that helps!
Pam says
I just take the rubber gasket out when making yogurt, to prevent the problem of absorbing odors from other foods cooked in the pot. It’s worked fine for me that way so far. Seems like a good idea though to invest in another gasket for neutral foods.
Harvey Miller says
First time yogurt maker using Ninja Food 8-qt cooker and Cultures for Health Greek Yogurt Starter Culture (heirloom). Details to follow, but important question first: At the end of the process, I added ¼ cup honey and a tsp of cinnamon. Oops, I thought I would save some yogurt for the next batch before adding honey and cinnamon, but I forgot. Can I use my sweetened and spiced yogurt as the active ingredient in the next batch, or do I need to start over with the starter culture.
For me, the ½ gal milk BOIL cycle took about 30 minutes or a bit less. I noticed the Ninja displayed “COOL” 30 minutes after starting, but I am not sure when it happened. The COOL cycle did not complete until 3 hours and 50 minutes after starting! WOW, did not expect it to take that long!! I chose 12 hours for the fermentation cycle with 8 hours being the minimum possible (and often recommended) setting. It was 12:27am the next day when the cycle completed. I added the set yogurt (yeah!) to my new Hatrigo 2-Quart Strainer and put it in the fridge. 8½ hours later, there was 1 qt of whey in the bottom of the strainer, and about 30 oz (by weight) of fairly thick yogurt in the strainer that I was able to recover. Any guidance about the difference between 8 hrs fermentation and 12 hrs? My understanding is more fermentation yields thicker yogurt. What is your experience?
The yogurt was quite tart with a different taste than what I have been buying at Sam’s Club. the ¼C honey sweetened it slightly, perhaps enough for me when I try it for breakfast with granola and blueberries.
TheTastyTravelers says
Hi Harvey- I would not use the already sweetened yogurt as a starter for your next batch. Once the honey has been added, the yogurt will not continue to set up. I had that issue when I first tried making yogurt. I’m not a honey expert, but honey has something in it that reacts with the active yogurt cultures that prevent the honey from fully forming. I’d recommend using an unsweetened starter to avoid any issues with this.
Since I have posted this recipe I have gotten all sorts of responses to the boil and cool time. It seems to vary quite drastically for everyone and I’m not sure why. For some, it’s much longer for the boil cycle and less for the cool cycle and vice versa. My advice would just be to wait for the machine to tell you when it’s finished.
I have not experimented too much with the extended fermentation times. But, it is my understanding that the flavor changes based on how long you let your yogurt ferment. The longer it ferments, the tangier it gets. To thicken the yogurt, do exactly what you did. I wish I had the Hatrigo strainer when I made my first yogurts! Strain the whey out to make it thicker. To make it sweeter, try adding sweetened coffee creamers instead of some of the milk or other sweeteners that have the flavor that you are looking for after the yogurt has finished straining. Honey helps to make it sweeter, but it does not get as sweet as the store-bought kinds without adding an additional sugar source. I really like to add lemon curd once it’s cooked. It makes it sweet and delicious!!
Norma says
different cultures make different textures and thicknesses as well. Different milks and levels of fat in the milk can change yogurts drastically. I’d recommend you read about different yogurt culture at https://www.culturesforhealth.com/learn/yogurt/choosing-a-yogurt-starter-culture/ Cultures for Health Greek is quite tangy/sour. I often will use a different starter or even probiotic capsules to get a desired flavor & then strain. You can strain any yogurt to give it a thicker consistency.
I suggest you try different cultures to find a flavor profile you enjoy. Just remember if you are making your yogurt in the ninja you need to use a thermophilic culture (needs to be kept warm while fermenting) & not a mesophilic (ferments at room temperature). Also, I would invest in a thermometer and make sure the milk has cooled enough before adding the starter culture. If the milk is too hot, the culture can die.
Shannon says
Do you have to use the pressure lid? I would prefer not it if I don’t have to.
TheTastyTravelers says
I haven’t tried it without the pressure cooker lid. I’m pretty sure you need it otherwise the machine won’t cycle through the yogurt function properly.
Shannon says
Yes I need to use that lid to start it as I tested that. I guess my real question was right now I only have one seal that I can’t get the food smell out of. If I leave the seal out do you think it will still work the same ? I read online somewhere is made the yogurt taste oniony.
TheTastyTravelers says
If you use the pressure cooking lid you need to use the seal. To get the smell out of your seal, put it in the freezer, or hang it outside for a day, or soak it, or put it in the dishwasher. You can also buy extra seals on Amazon so that you have one that you only use for making yogurt.
Rob says
I though silicone does not absorb smells?
Denise says
My first attempt at making yoghurt in my foodi has been a great success, thanks to you 😃
The only issue I had was with the cooling which took about three hours which meant the whole thing wasn’t finished until much later than planned, but, having read some more of the comments I’ll try taking the lid off to cool it quicker next time.
Thanks again 😃
Pat says
The recipe that came with my foodi says 3 tablespoons of starter. Your recipe calls for 2 tablespoons. My yogurt was a little runny. Should I use 2 tablespoons instead of 3?
TheTastyTravelers says
I can’t speak to the recipe in the book that came with yours. But, in general, if the yogurt is runny, you might want to try to strain it with a yogurt strainer, incubate longer or refrigerate longer. I would not think that adding less starter would make it any thicker.
Sherry says
I have searched and searched for a good recipe. Thank you for finally taking the mystery out of it!
Katelyn P. says
So it came out good on the first try. My only issue is after i added the honey and vanilla it is looser than i was expecting. Is there anyway to fix it now?
TheTastyTravelers says
You can try to drain some with the cheesecloth and put it back in the refrigerator or use a yogurt strainer if you have it. If the consistency is runnier than you would like, strain it next time to thicken it up. The amount of whey can vary each time you make it. Try to remove some of it as it separates from the yogurt.
Sarah says
Hi! Thanks for this recipe! My cool phase was taking far too long once it hit 2hrs, so I opened up the pressure top, gave it a stir and checked the team – about 124 degrees F. I decided to let it cool uncovered for about 30 minutes which brought it down to 110.4 on my thermometer and presto – Foodi beeped and changed to the Add and Stir message! Next time I’m just going to take the top off as soon as it changes to the Cool stage to try to make this not an all-day event. Otherwise this is great – thanks again for the instructions!
Maribel says
Have you tried using milk alternatives or lactose free milk? How do you think it will come out using lactose free whole milk? Do you think it will make a difference?
TheTastyTravelers says
Hi Maribel- I haven’t tried making yogurt with any milk alternatives. Unfortunately, I’m not able to offer any advice on this substitution.