

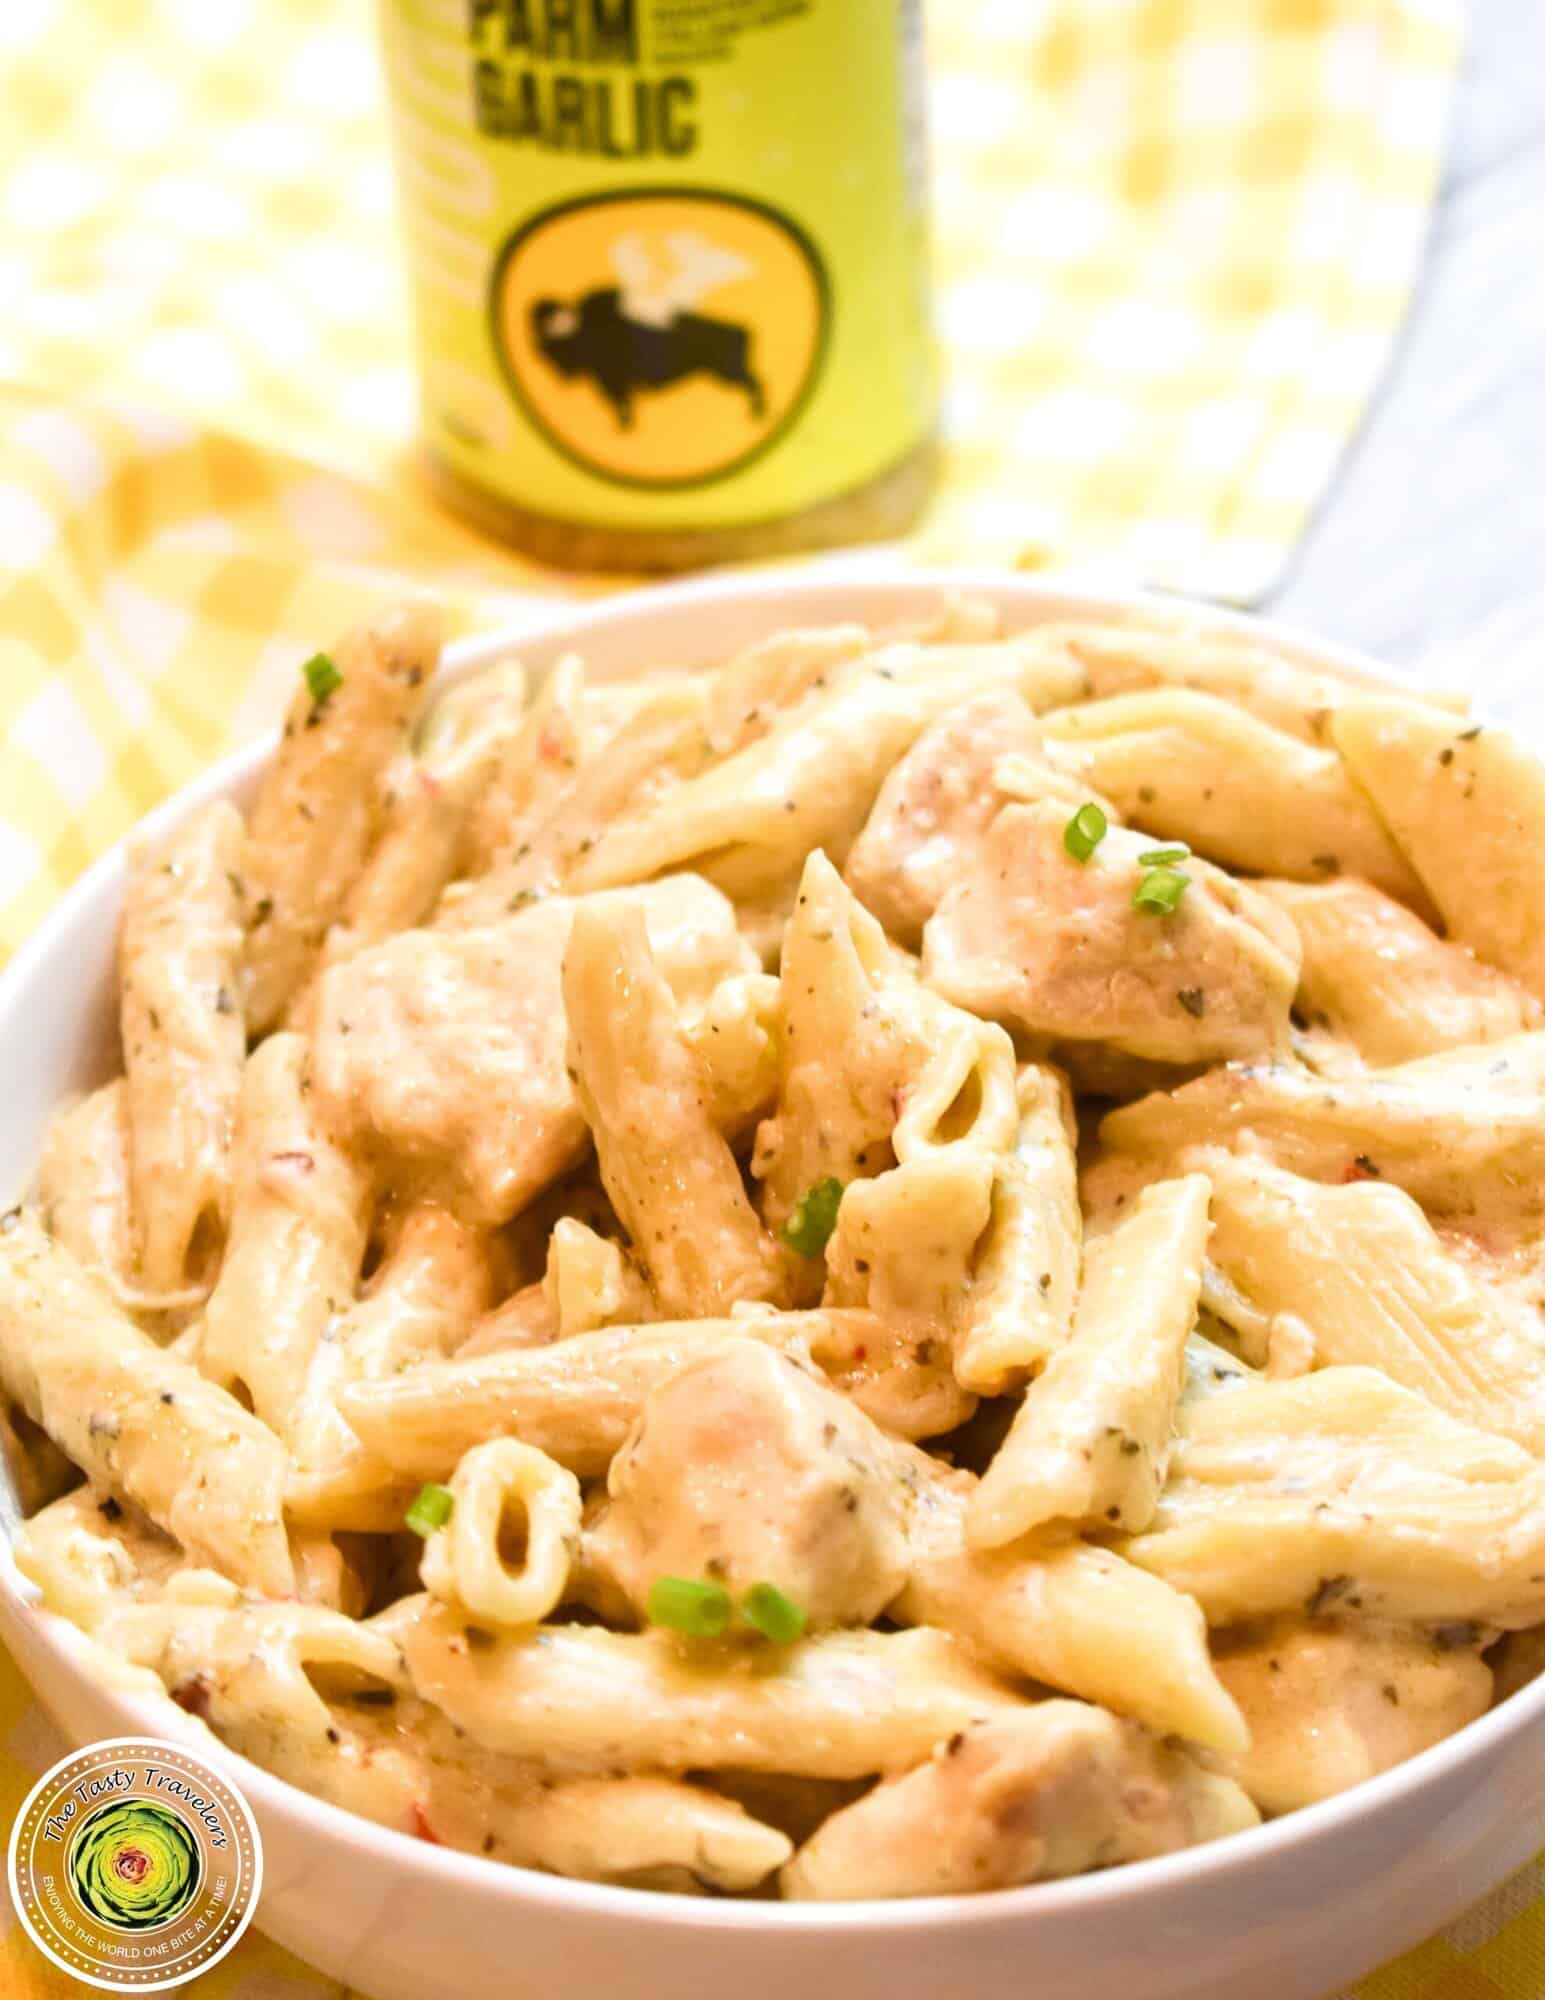
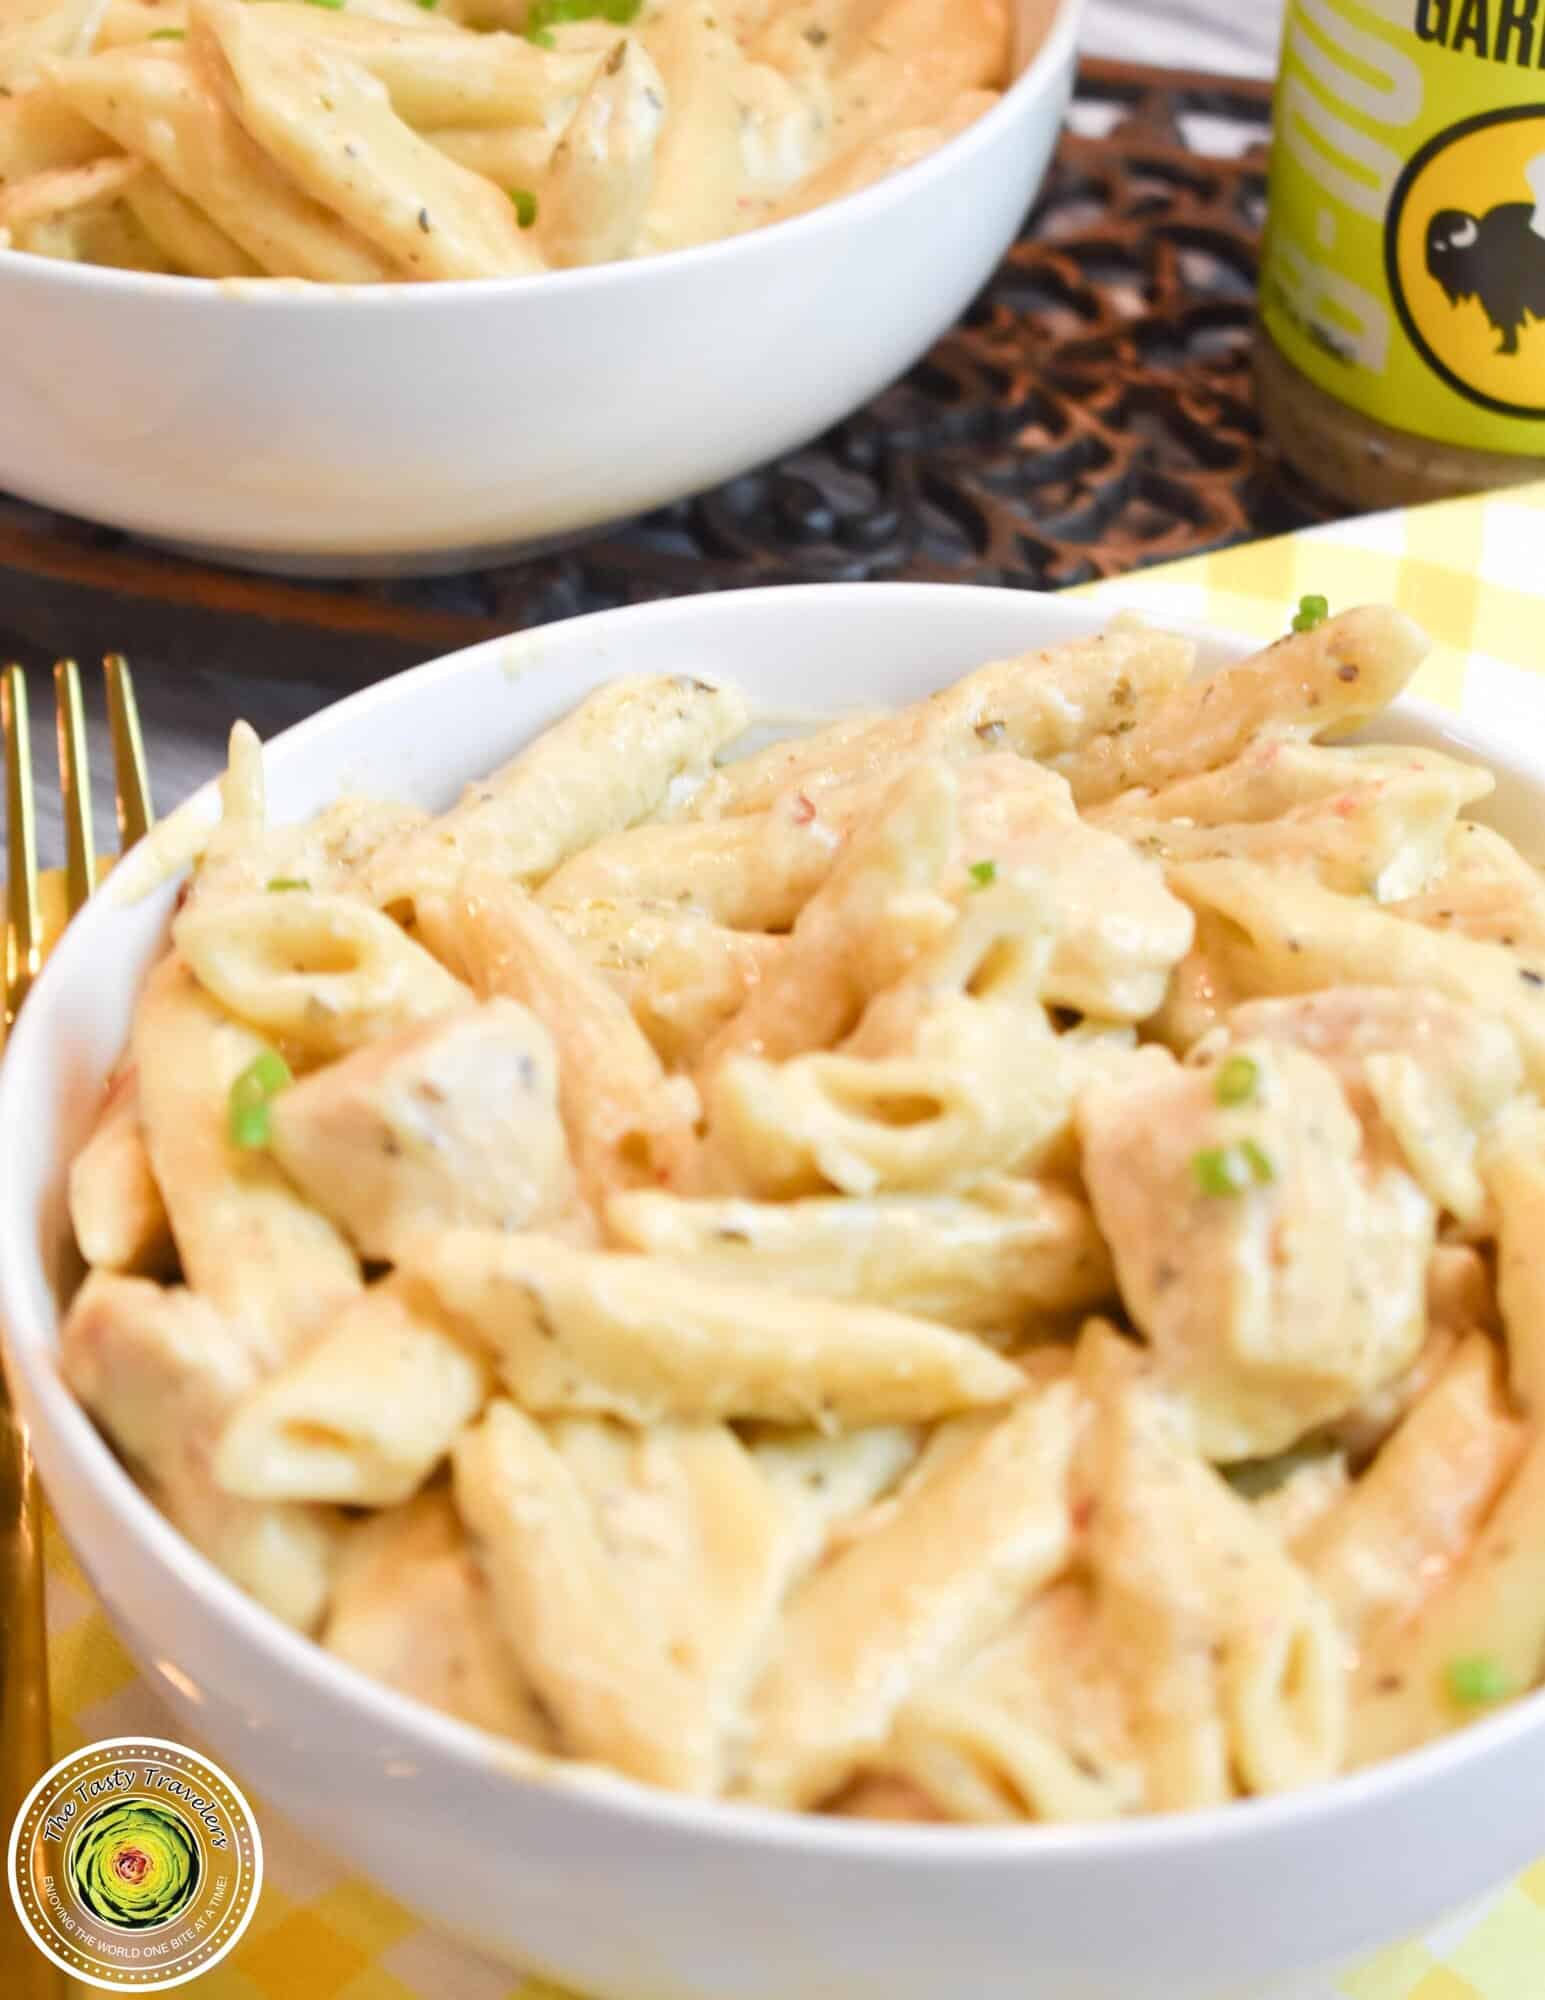
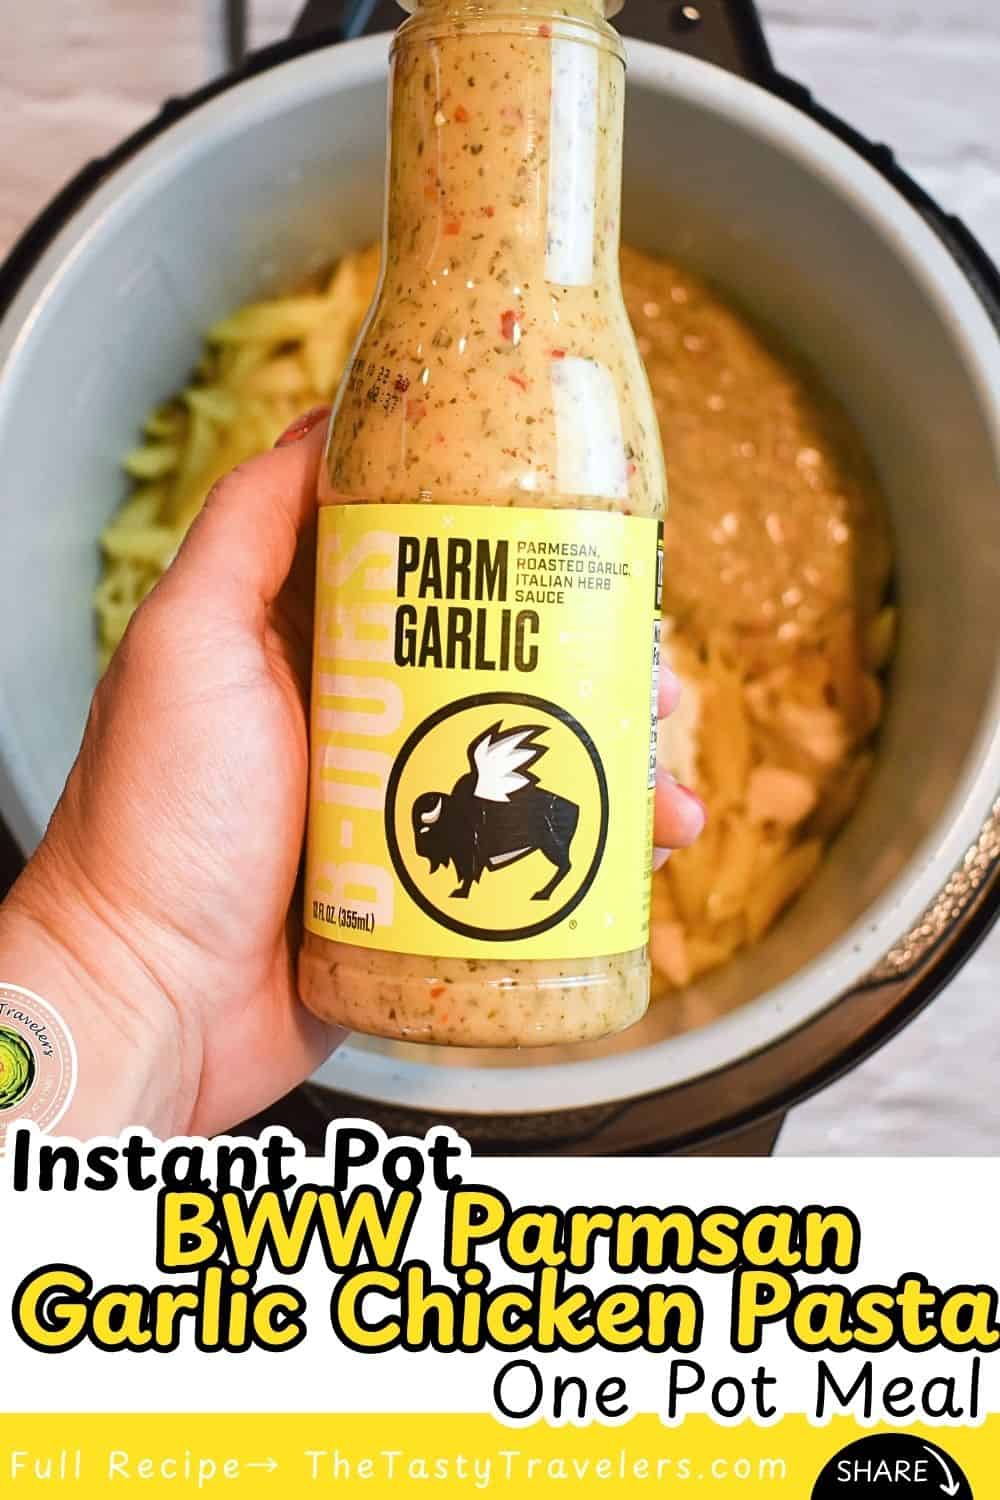
This Instant Pot Parmesan Garlic Chicken Pasta uses Buffalo Wild Wings Parmesan Garlic Sauce, and it is one of those recipes that tastes like you spent way more time on it than you actually did. The sauce does most of the work for you, and combined with cream cheese, parmesan, and chicken, it turns into this rich, creamy pasta dish that is genuinely hard to stop eating.
Jump to:
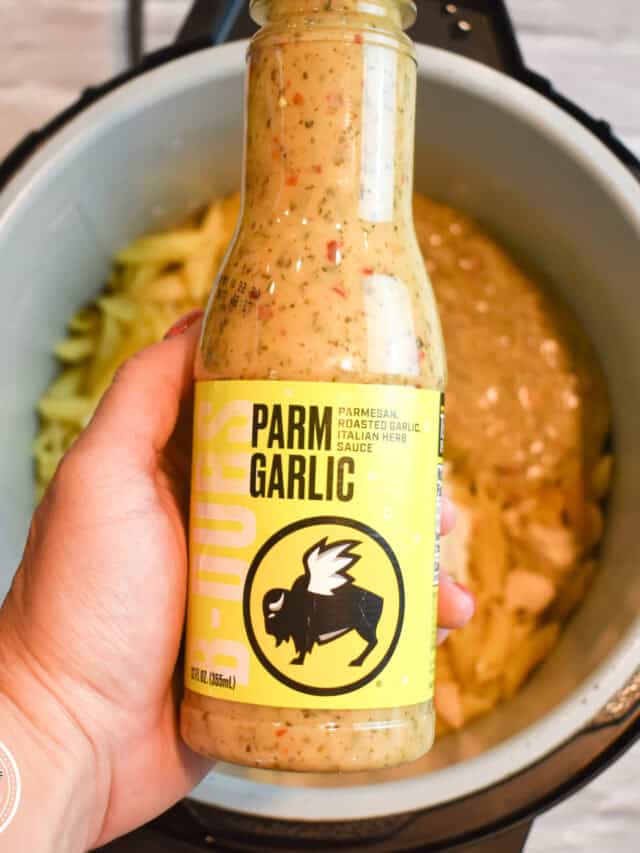
The Buffalo Wild Wings Parmesan Garlic Sauce is the star of this recipe, and I want to talk about it for a second because it surprised me. I expected it to taste just like a regular garlic parmesan sauce, but there is actually a little bit of heat at the end that you do not get when it is on wings. It is not spicy by any means, but it has just enough of a kick to keep the dish interesting. If you want to tone it down even further, just reduce the amount of sauce and add a splash of extra chicken broth to replace the volume.
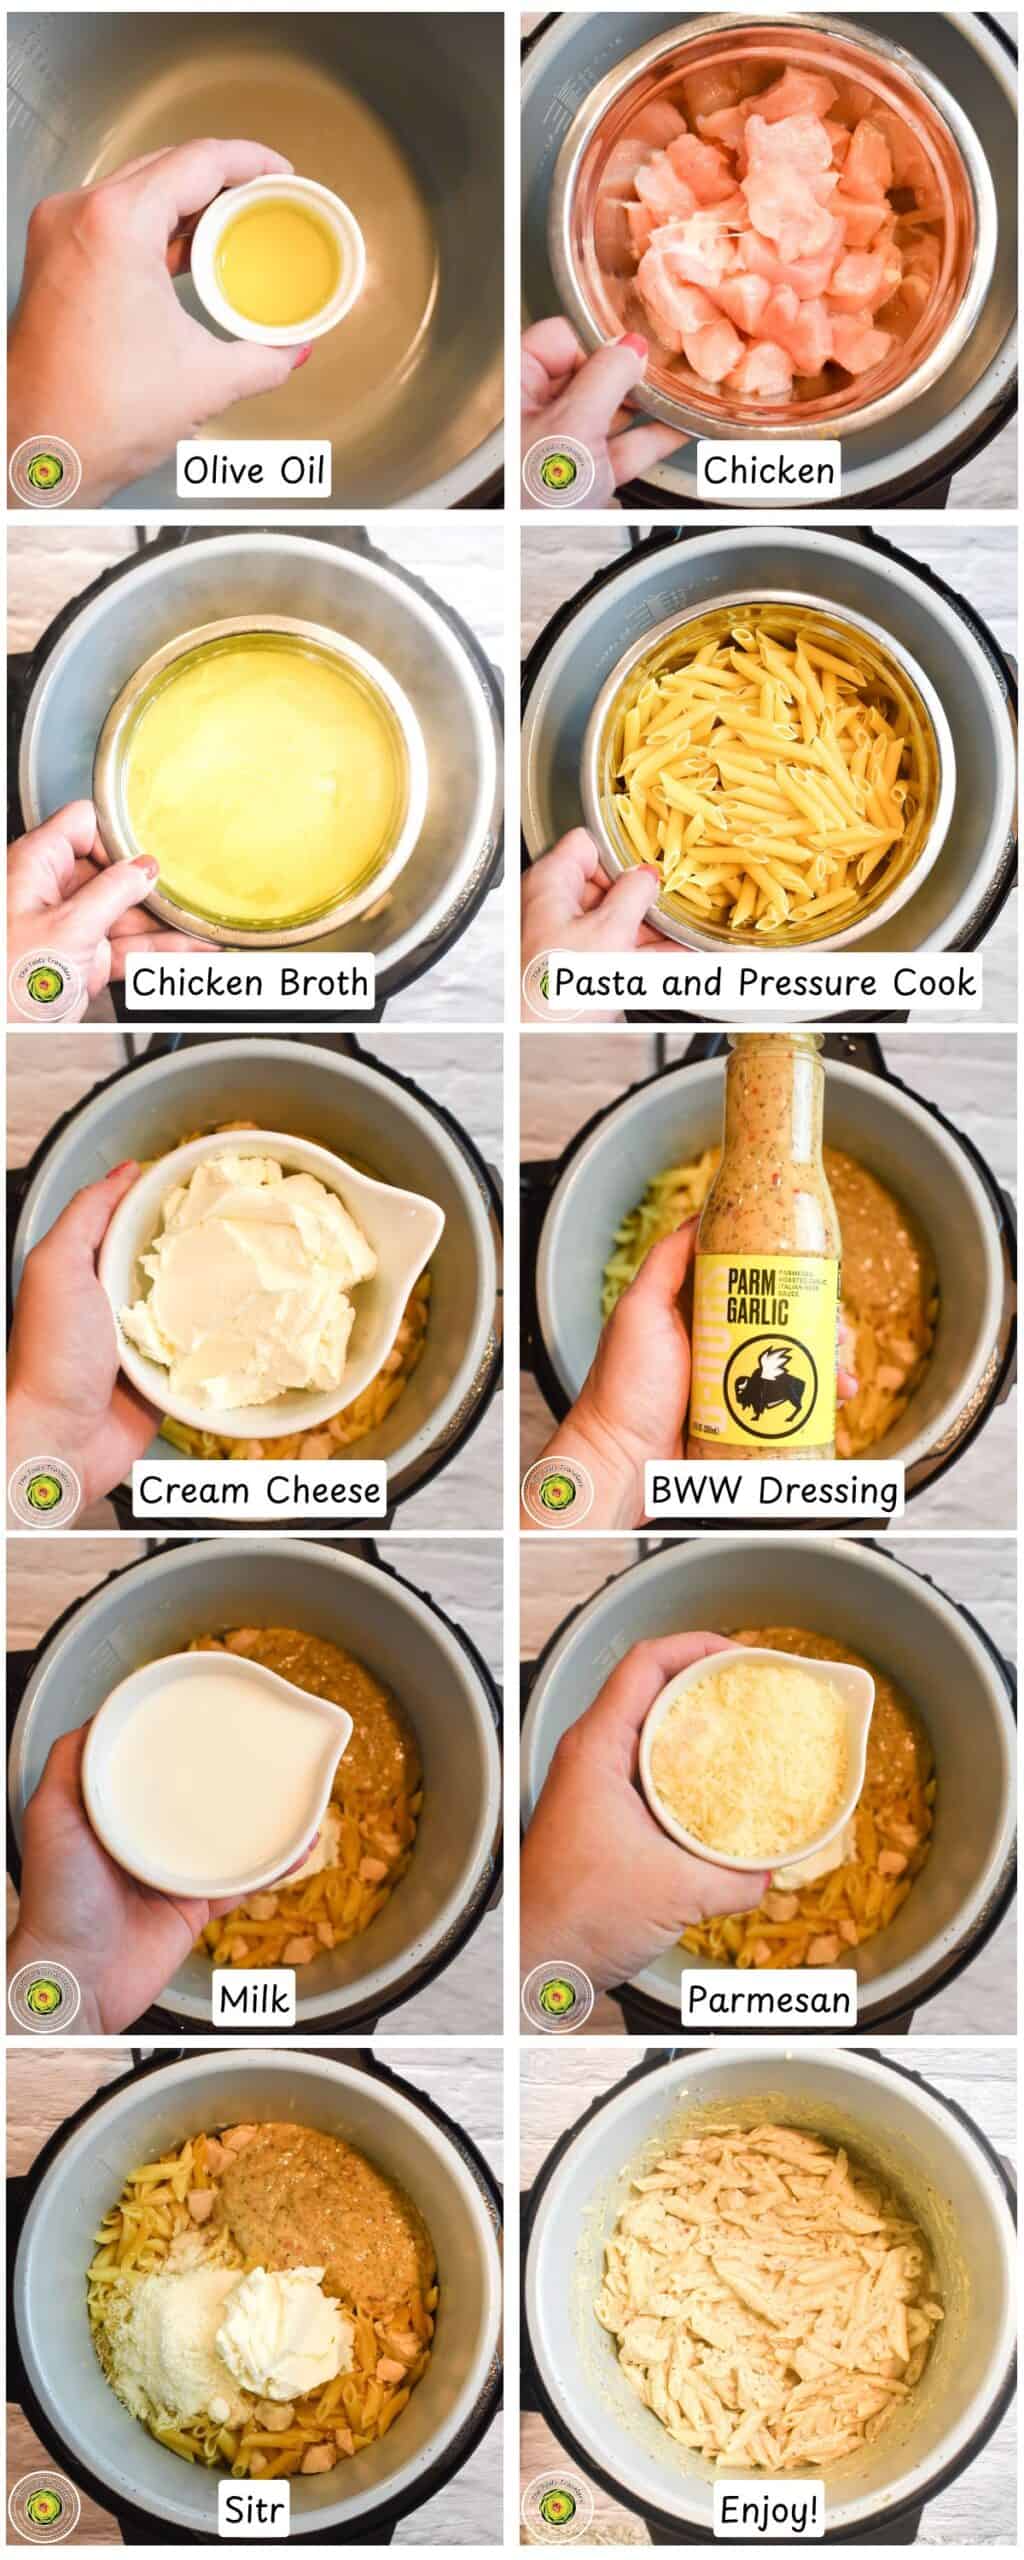
One of the most important things to know about this recipe before you start is how to cut the chicken. Boneless skinless chicken breasts cut into one-inch cubes is the way to go here. The reason is simple. Cubed chicken cooks in the same amount of time as the pasta does, and full chicken breasts do not. If you throw a whole chicken breast in there with the pasta, the pasta will be done long before the chicken is safe to eat. Cut it into cubes and everything finishes at exactly the right time.
When you add the pasta to the Instant Pot, do NOT stir it into the liquid. I know it feels wrong to just push the penne down and leave it sitting there, but stirring the pasta before pressure cooking can cause a burn notice. Just press it down until most of it is submerged, close the lid, and trust the process. It will cook evenly, I promise. Any pasta that looks slightly undercooked when you open the lid will finish cooking when you add the cream cheese and sauce on sauté.
Cream cheese is what takes this from a good pasta dish to a GREAT one. It melts into the sauce and makes everything thick, velvety, and rich in a way that milk alone just cannot do. Make sure you stir really well once you add the cream cheese, parmesan garlic sauce, milk, and parmesan cheese together on the sauté setting. You want everything fully combined so you get that creamy sauce coating every single piece of penne pasta instead of pools of unincorporated cream cheese sitting at the bottom of the pot.
This garlic parmesan chicken pasta recipe is not a low-calorie dish and it is not trying to be. It is a rich, satisfying, full-flavored pasta recipe that the whole table is going to want seconds of. Serve it with a simple salad and some garlic bread and you have a dinner that looks and tastes like you put in a lot more effort than you actually did. Leftovers reheat really well too, either in the microwave or back in the Instant Pot on the sauté setting with a splash of extra chicken broth to loosen the sauce back up.
Tips for making Instant Pot Parmesan Garlic Chicken Pasta
Yes, but you will still need to cut it into 1-inch cubes before cooking. Large pieces of chicken and whole chicken breasts take substantially longer to cook than pasta does, so it is not recommended to use whole pieces. A great tip is to buy boneless skinless chicken breasts, cut them into small pieces, and freeze them in a zip-lock bag so they are ready to go whenever you want to make this recipe.
Yes! When doubling, double all of the ingredients except the chicken broth. Instead of doubling the chicken broth, only add an additional 3 cups rather than the full 3.5 cups.
Technically yes, but the chicken broth adds so much extra flavor to the pasta that it is really worth using. If you use water instead, the flavor will taste more watered down and less rich overall.
No problem! For al dente pasta, take the recommended cooking time on the box, divide by 2, then subtract 2. For pasta cooked a little more, divide by 2 then subtract 1. For fully cooked and tender pasta, divide by 2 only. So a pasta with a 10-minute box time would pressure cook for 3, 4, or 5 minutes depending on your preference.
Yes, you can use whatever sauce you would like and it does not have to be Buffalo Wild Wings brand. That said, sticking with a mild and creamy sauce is a good idea for this recipe since it pairs so well with the cream cheese and parmesan. If you prefer a milder flavor, reduce the amount of sauce and increase the chicken broth to replace the volume.
The main ingredients are garlic, parmesan, red pepper flakes, Italian herbs, and usually some form of mayonnaise. You can make your own homemade version or buy it pre-made at your local grocery store. The Buffalo Wild Wings Parmesan Garlic Sauce is what this recipe uses and it is genuinely delicious.
Leftovers reheat really well in the microwave or back in the Instant Pot on the sauté setting. You may want to add a splash of extra chicken broth to loosen the sauce back up since it thickens in the refrigerator. Leftover pasta keeps well in an airtight container in the refrigerator for several days, or in the freezer for about 3 months.
Looking for more Instant Pot Recipes?


Ingredient tips and substitutions
The full ingredient list is at the bottom of this post in the recipe card.
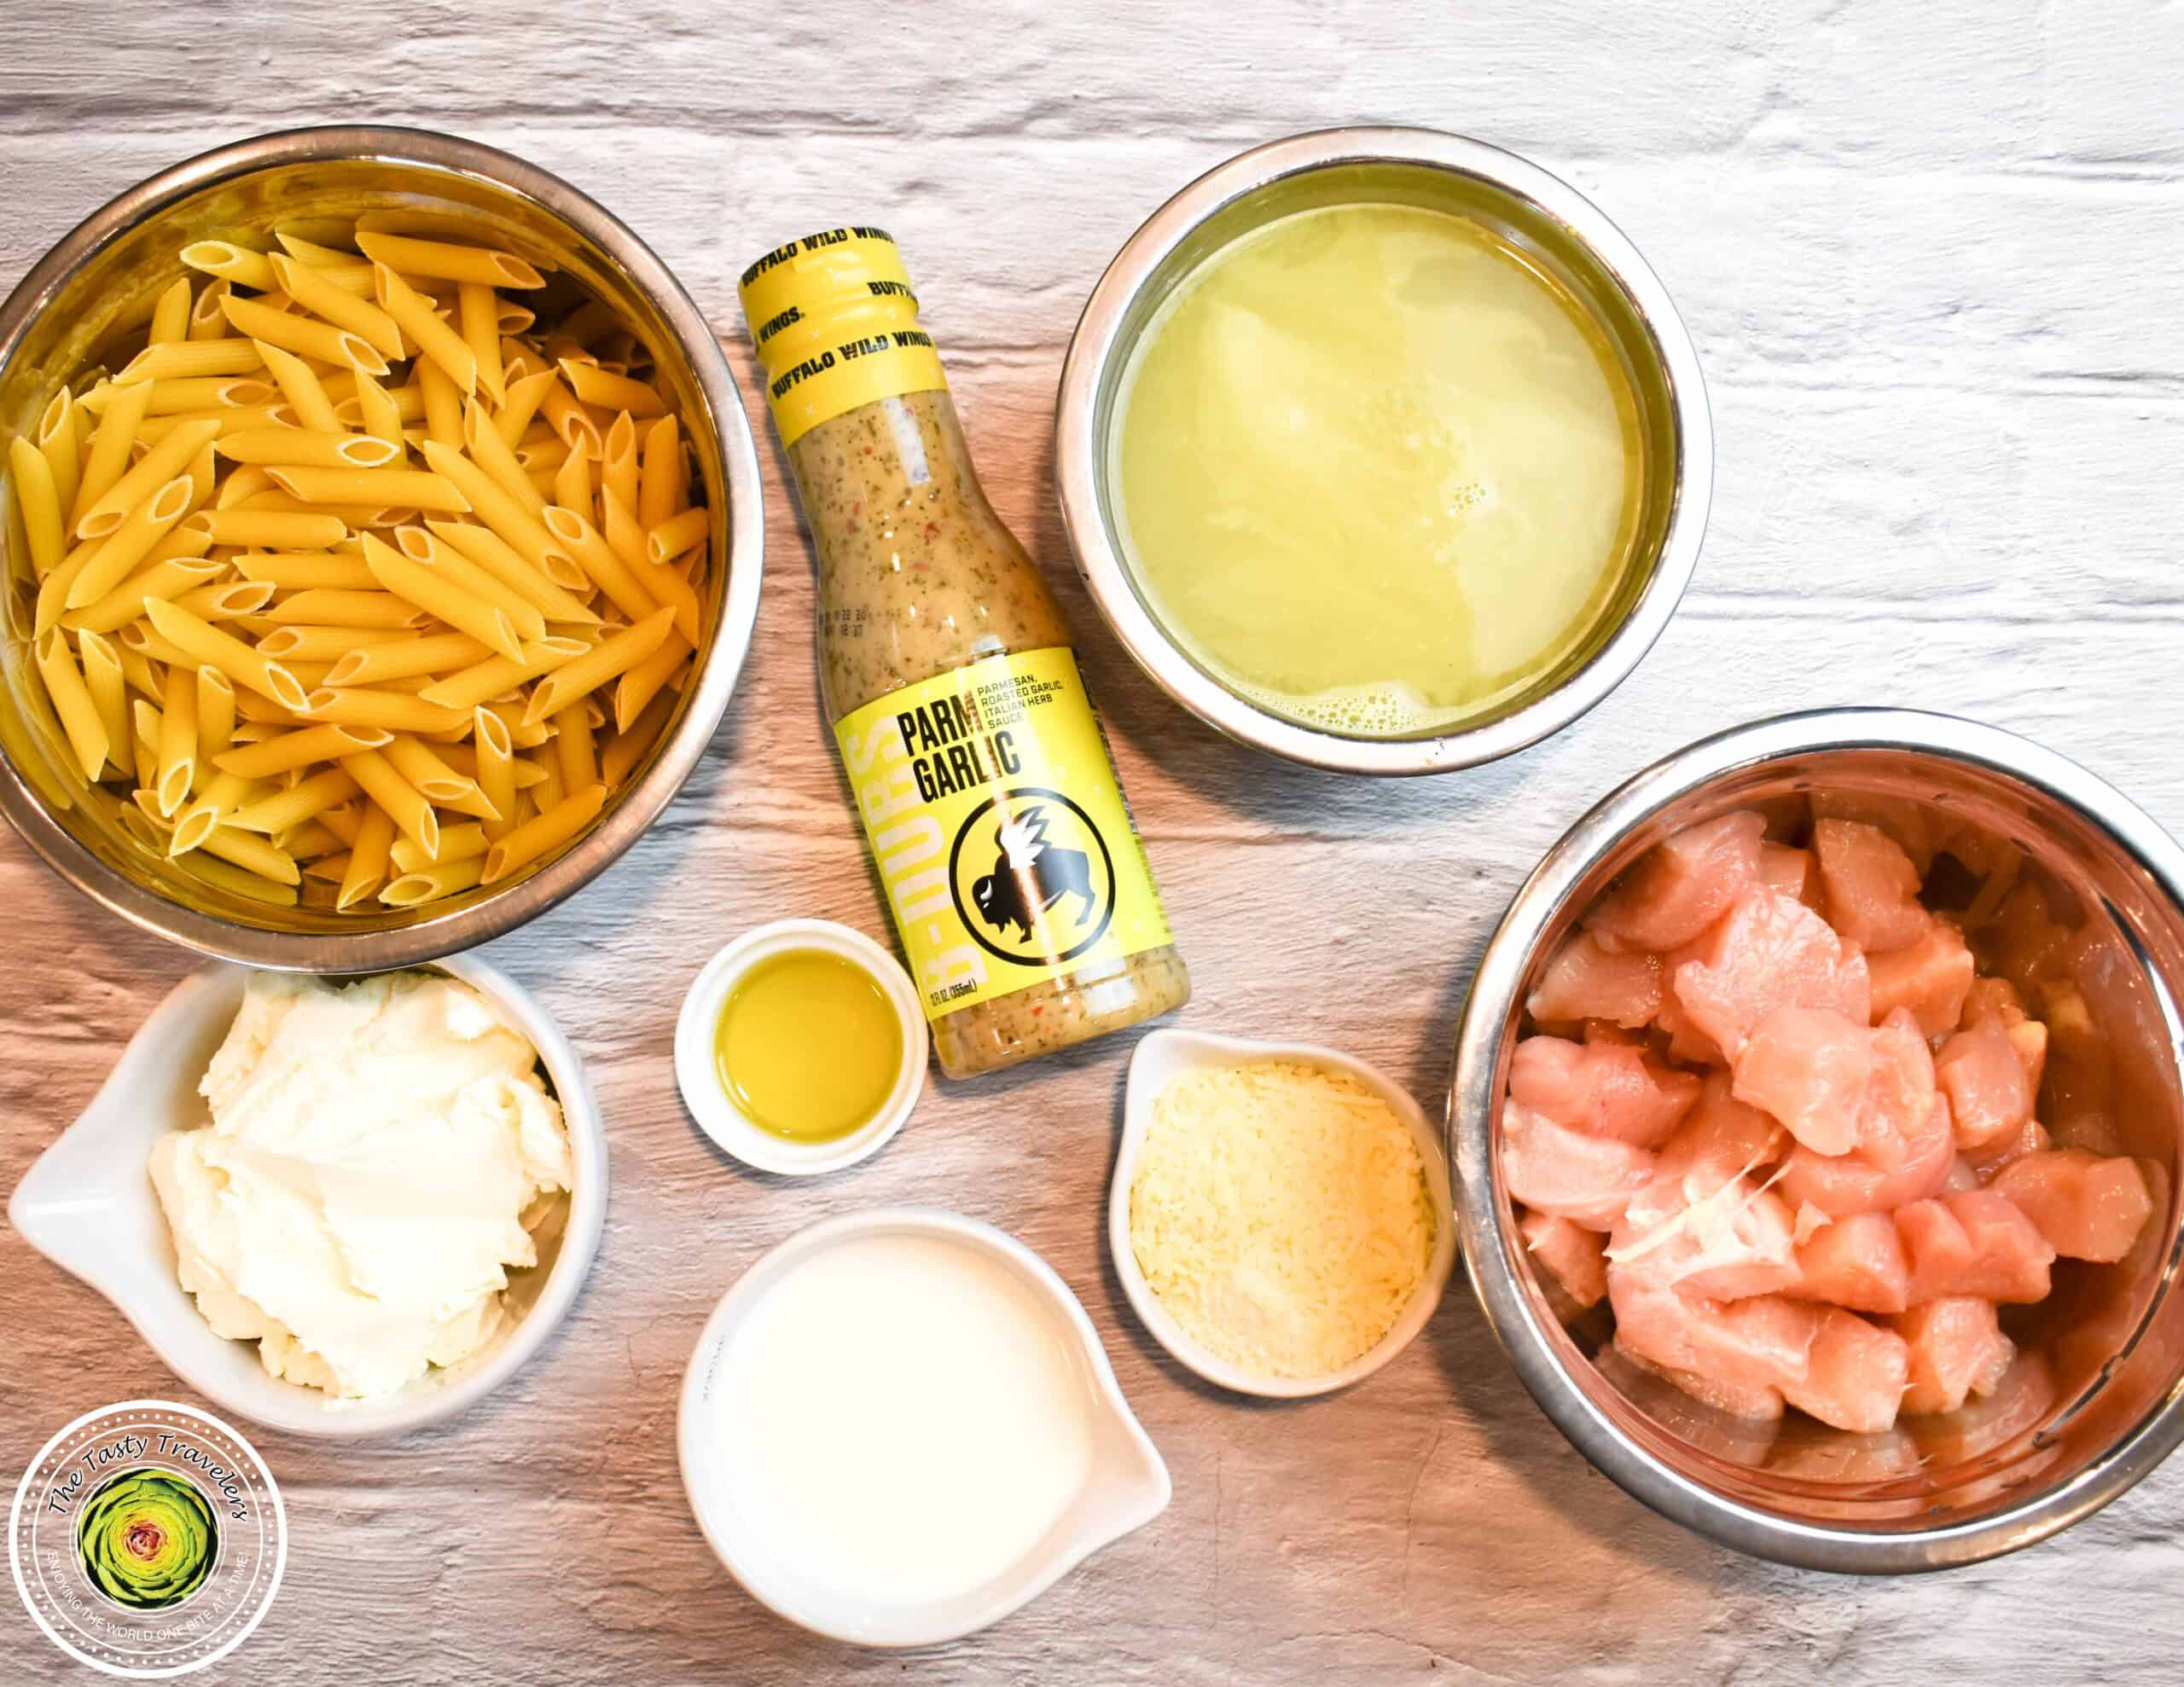
- Olive Oil: Vegetable oil or canola oil can be used instead if you prefer.
- Chicken Breasts: Boneless skinless chicken thighs work as a substitute, just make sure they are cut into small 1-inch pieces so they cook in the same amount of time as the pasta. Chicken cutlets or chicken tenders also work well.
- Chicken Broth: Water can be used in a pinch, but the chicken broth adds a lot of extra flavor to this garlic parmesan chicken pasta recipe and is worth using if you have it.
- Pasta: Any short pasta works here, including penne pasta, rigatoni, ziti, or rotini. Do not use already cooked pasta and do not use long pasta like spaghetti. If you use a different shape, calculate the pressure cooking time by dividing the box time by 2 and subtracting 2. Gluten-free pasta can be used but cooking times will vary.
- Cream Cheese: Regular or reduced-fat cream cheese both work fine for this recipe.
- Buffalo Wild Wings Parmesan Garlic Sauce: Any mild and creamy wing sauce or parmesan garlic sauce can be used as a substitute. For a milder flavor, reduce the amount of sauce and replace the difference with extra chicken broth.
- Milk: Whole milk is what I used, but skim, 1%, or 2% all work. For an extra rich and creamy pasta dish, heavy cream can be used instead.
- Parmesan Cheese: Shredded or grated parmesan cheese both work great here. If you do not have parmesan, a small amount of mozzarella can be used, but stir continuously while it melts to prevent it from clumping.
Directions for Making Instant Pot Parmesan Garlic Chicken Pasta
- Turn Instant Pot on saute, high for 15 minutes.
- Pour in Olive Oil.
- Once the Olive Oil is hot, pour in the chicken. Saute chicken until lightly browned on all sides.
- Once the chicken is lightly browned, pour in chicken broth. Stir and lightly scrape the bottom of the pot to remove any browned chicken bits. If using a nonstick pot, use a silicone spatula.
- Add the pasta on top. DO NOT STIR PASTA! Simply just push all of the pasta down, so most of it is covered by the liquid.
- Close pressure cooking lid, and move valve to the seal position. Pressure cook on high for 3 minutes.
- *If you are using a different shape of pasta, follow these instructions to determine the proper pressure cooking time: Take the recommended cooking time that is on the box of pasta and divide by 2 and then subtract 2. Pressure cook for that many minutes. For example, if the box recommends 10 minutes of cook time, divide 10 by 2=5. Subtract 2. 5-2=3. Pressure cook for 3 minutes.
- Once the timer beeps and the Instant Pot is finished pressure cooking, move the valve to the vent position and release the pressure. If a lot of liquid starts to come out of the Instant Pot, close the vent, wait 3-5 minutes and then try to release the pressure again. Continue to do this until all pressure has been released.
- Stir chicken and pasta together. Don’t worry if all of the pasta isn’t cooked all the way. It will continue to cook as you add the additional ingredients. Turn Instant Pot on saute and add cream cheese, parmesan garlic dressing, milk, and parmesan cheese. Stir well until all ingredients are evenly combined.
- Serve and enjoy!
Save for Later on Pinterest!
Recipe

Instant Pot Parmesan Garlic Chicken Pasta-Buffalo Wild Wings Sauce
Rate this Recipe Print Recipe Pin RecipeEquipment
Ingredients
- 1 tablespoon (1 tablespoon) Olive Oil
- 2 (2) Chicken Breasts (Boneless; Skinless; Cut into one inch cubes)
- 3 ½ cups (828 ml) Chicken Broth (Low Sodium)
- 16 ounces (453 ⅗ g) Pasta (I used Penne, but any short pasta may be used.)
- 8 ounces (226 ⅘ g) Cream Cheese
- 8 ounces (226 ⅘ g) Buffalo Wild Wings Parmesean Garlic Sauce
- ⅔ cup (157 ¾ ml) Milk
- ½ cup (50 g) Parmesan Cheese
Instructions
- Turn Instant Pot on saute, high for 15 minutes.
- Pour in Olive Oil.
- Once the Olive Oil is hot, pour in the chicken. Saute chicken until lightly browned on all sides.
- Once the chicken is lightly browned, pour in chicken broth. Stir and lightly scrape the bottom of the pot to remove any browned chicken bits. If using a nonstick pot, use a silicone spatula.
- Add the pasta on top. DO NOT STIR PASTA! Simply just push all of the pasta down, so most of it is covered by the liquid.
- Close pressure cooking lid, and move valve to the seal position. Pressure cook on high for 3 minutes. *If you are using a different shape of pasta, follow these instructions to determine the proper pressure cooking time: Take the recommended cooking time that is on the box of pasta and divide by 2 and then subtract 2. Pressure cook for that many minutes. For example, if the box recommends 10 minutes of cook time, divide 10 by 2=5. Subtract 2. 5-2=3. Pressure cook for 3 minutes.
- Once the timer beeps and the Instant Pot is finished pressure cooking, move the valve to the vent position and release the pressure. If a lot of liquid starts to come out of the Instant Pot, close the vent, wait 3-5 minutes and then try to release the pressure again. Continue to do this until all pressure has been released.
- Stir chicken and pasta together. Don't worry if all of the pasta isn't cooked all the way. It will continue to cook as you add the additional ingredients. Turn Instant Pot on saute and add cream cheese, parmesan garlic dressing, milk, and parmesan cheese. Stir well until all ingredients are evenly combined.
- Serve and enjoy!
Notes
Nutrition
Nutrition information is provided as a courtesy and is an estimate only.
Leave a comment and rate this recipe!
Keep scrolling to see my newest recipes!
-
Ninja Creami Strawberry Coco-Nut Protein Ice Cream
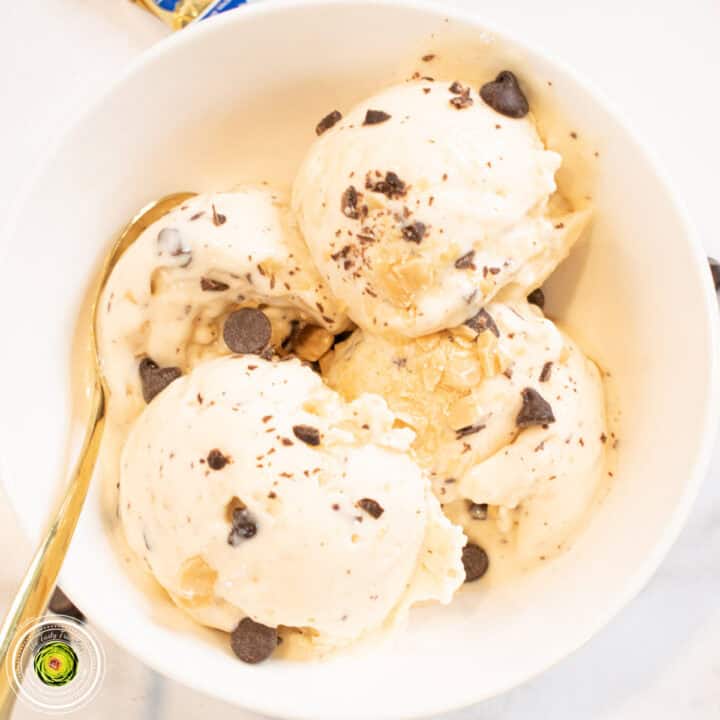
If you love the combination of strawberry, coconut, and chocolate, you have to give this Ninja Creami strawberry coco-nut protein ice cream a try. It’s creamy, packed with real strawberry flavor, and the toasted coconut goes surprisingly well with chocolate chips and walnuts. This recipe comes in at 374 calories, 36 grams of protein, 4 grams of sugar, 19 grams of fat, and 19 carbs for the ENTIRE pint. Jump to: Tips for making Ninja Creami Strawberry Coco-Nut Protein Ice Cream Looking for more Ninja Creami Protein Ice Cream Recipes? Ingredient tips and substitutions Directions for Making the Ice Cream […]
-
Is It Normal for the Ninja Creami Spindle to Stick Out?
If you look at your Ninja Creami and notice the spindle poking out of the bottom of the machine, you might wonder if something is wrong. Nothing is wrong. Here’s why it looks like that and what to expect. Is it normal for the Ninja Creami spindle to stick out? Yes. The spindle sticking out of the bottom of the machine when it is off is completely normal and exactly how it is supposed to look. It sticks out about an inch when the machine is not in use. It should not go all the way back up into the […]
-
Ninja Creami Super Strawberry Protein Ice Cream
If you love strawberry ice cream, this Ninja Creami super strawberry protein ice cream is going to blow your mind. It has fresh strawberry flavor from FOUR different ingredients, a creamy texture, and a really bright pink color. Trust me, you’re going to love this recipe. This recipe comes in at 215 calories, 35 grams of protein, 6 grams of sugar, 3 grams of fat, and 12 carbs for the ENTIRE pint. Jump to: Tips for making Ninja Creami Super Strawberry Protein Ice Cream Looking for more Ninja Creami Protein Ice Cream Recipes? Ingredient tips and substitutions Directions for Making […]


-
How to Get Rid of Ice on the Outside of Ninja Creami Ice Cream
Sometimes a layer of ice forms around the inside walls of the Ninja Creami container during freezing, sitting between the outer edge of the frozen base and the container. If that ice gets mixed into the ice cream when you process it, it can affect the texture and make it icier than it should be. Here’s how to fix it so that the ice cream is creamy instead of icy. Why does ice form around the outside of the frozen base? When the base freezes, moisture from condensation or from the base itself can collect between the frozen mixture and […]
-
Ninja Creami Taffy Apple Protein Ice Cream
Taffy apples are one of my favorite fall treats, and this Ninja Creami taffy apple protein ice cream tastes just like one. You get that sweet caramel flavor, real green apple, and chopped peanuts in every bite. It’s creamy, sweet, a little tart, and so much fun to eat. This recipe comes in at 293 calories, 33 grams of protein, 17 grams of sugar, 8 grams of fat, and 26 carbs for the ENTIRE pint. Jump to: Tips for making Ninja Creami Taffy Apple Protein Ice Cream Looking for more Ninja Creami Protein Ice Cream Recipes? Ingredient tips and substitutions […]
-
When to Use Re-Spin vs. Processing on Ice Cream Again in Ninja Creami
Re-Spin and the Ice Cream function on the Ninja Creami are not interchangeable. Using the wrong one at the wrong time will not give you the result you’re looking for and can even damage your machine. Here’s exactly when to use each one. What is the difference between Re-Spin and processing on Ice Cream? Ice Cream (and other processing functions) are designed to process a frozen solid base. Re-Spin is designed to further smooth a base that has just been processed, but came out with a texture that isn’t quite right. They are two different functions for two different situations. […]


-
Ninja Creami Caramel Cookie Supreme Protein Ice Cream
Caramel ice cream loaded with chunks of sugar cookie dough and pieces of Werther’s Original candies? Yes please!!! This Ninja Creami caramel cookie supreme protein ice cream is creamy, sweet, and tastes like a no-bake sugar cookie wrapped up in caramel ice cream with 30 grams of protein in the ENTIRE pint. This recipe comes in at 308 calories, 30 grams of protein, 7.5 grams of sugar, 7 grams of fat, and 31 carbs for the ENTIRE pint. Jump to: Tips for making Ninja Creami Caramel Cookie Supreme Protein Ice Cream Looking for more Ninja Creami Protein Ice Cream Recipes? […]
-
Ninja Creami Caramel Chocolate Chip Cheesecake Protein Ice Cream
Caramel, cheesecake, and chocolate chips all in one ice cream? Yes please!!! This Ninja Creami caramel chocolate chip cheesecake protein ice cream is thick, creamy, and has so much real caramel flavor with bits of Werther’s Original candies and chopped chocolate chips throughout every single bite. This recipe comes in at 315 calories, 30 grams of protein, 1 gram of sugar, 9.5 grams of fat, and 37 carbs for the ENTIRE pint. Jump to: Tips for making Ninja Creami Caramel Chocolate Chip Cheesecake Protein Ice Cream Looking for more Ninja Creami Protein Ice Cream Recipes? Ingredient tips and substitutions […]
-
Ninja Creami Cotton Candy Protein Ice Cream
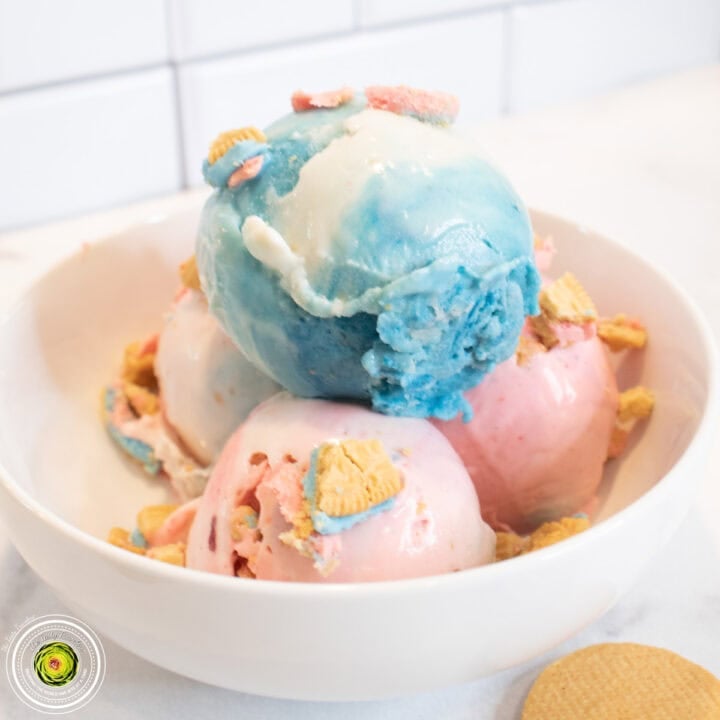
If you love cotton candy, you have to try this Ninja Creami cotton candy protein ice cream. It tastes EXACTLY like the cotton candy you’d get at a carnival, has 31 grams of protein per pint, and it comes out pink, white, and blue right in the same container. You would never know it’s a protein ice cream! This recipe comes in at 357 calories, 31 grams of protein, 16 grams of sugar, 11.5 grams of fat, and 53 carbs for the ENTIRE pint. Jump to: Tips for making Ninja Creami Cotton Candy Protein Ice Cream Looking for more Ninja […]

-
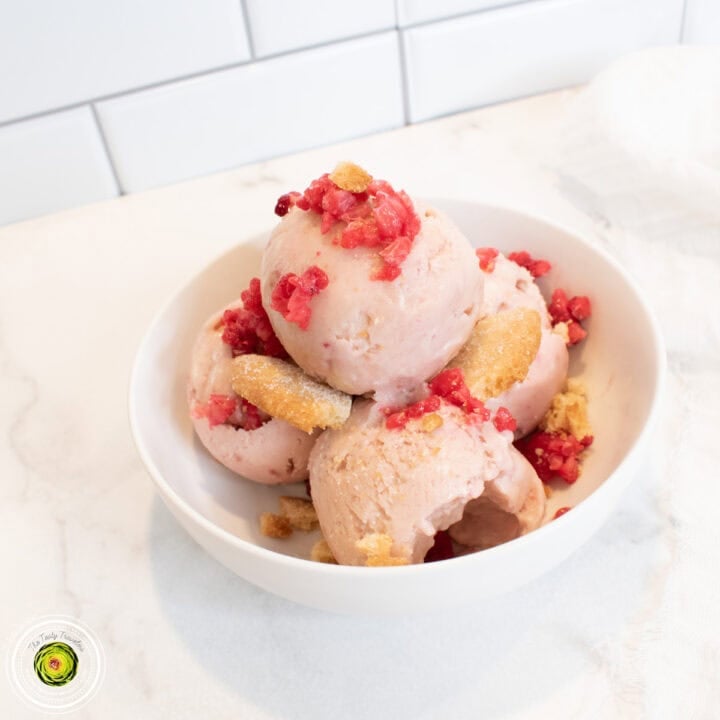
Ninja Creami Strawberry Pretzel Pie Protein Ice Cream
If you have ever had strawberry pretzel pie at a summer BBQ or potluck, you know how good those flavors are together. This Ninja Creami strawberry pretzel pie protein ice cream takes that same combination of sweet strawberry, cheesecake, and crunchy pretzel and turns it into a thick and creamy frozen treat. I promise you would never know it has 33 grams of protein! This recipe comes in at 359 calories, 33 grams of protein, 10 grams of sugar, 4 grams of fat, and 50 carbs for the ENTIRE pint. Jump to: Tips for making Ninja Creami Strawberry Pretzel Pie […]
-
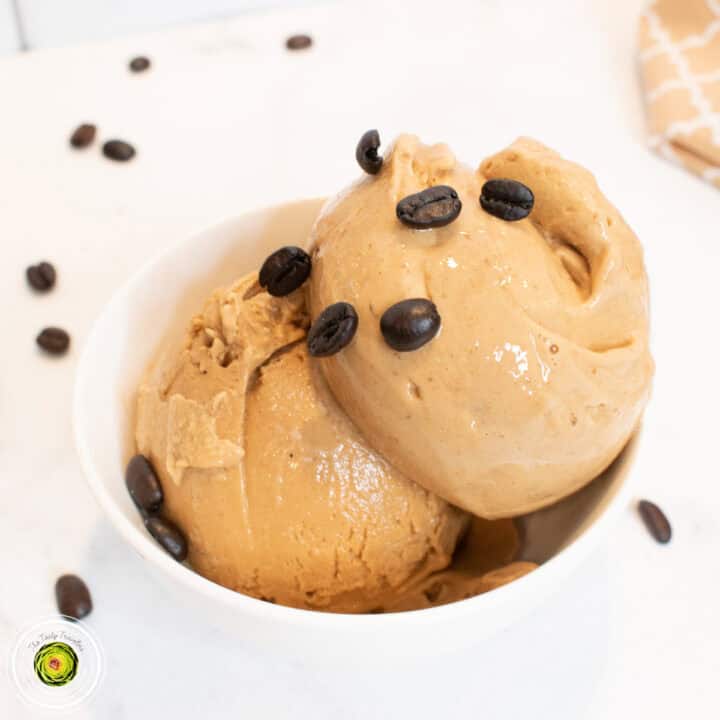
Ninja Creami Coffee Toffee Protein Ice Cream
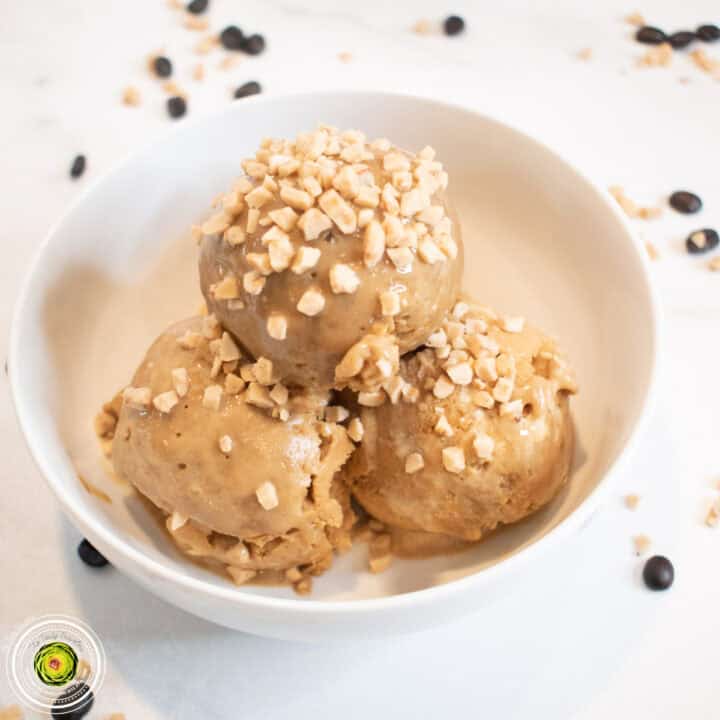
If you love coffee ice cream, you have to try my recipe for Ninja Creami toffee coffee protein ice cream. It has the perfect amount of coffee flavor, a thick and creamy texture, and a really good crunch from the Heath chip mix-ins. I promise you would never know it’s a protein ice cream! This recipe comes in at 357 calories, 30 grams of protein, 19 grams of sugar, 13 grams of fat, for the ENTIRE pint. Jump to: Tips for making Ninja Creami Toffee Coffee Protein Ice Cream Looking for more Ninja Creami Protein Ice Cream Recipes? Ingredient tips […]
-
Ninja Creami Baseball Nut Protein Ice Cream
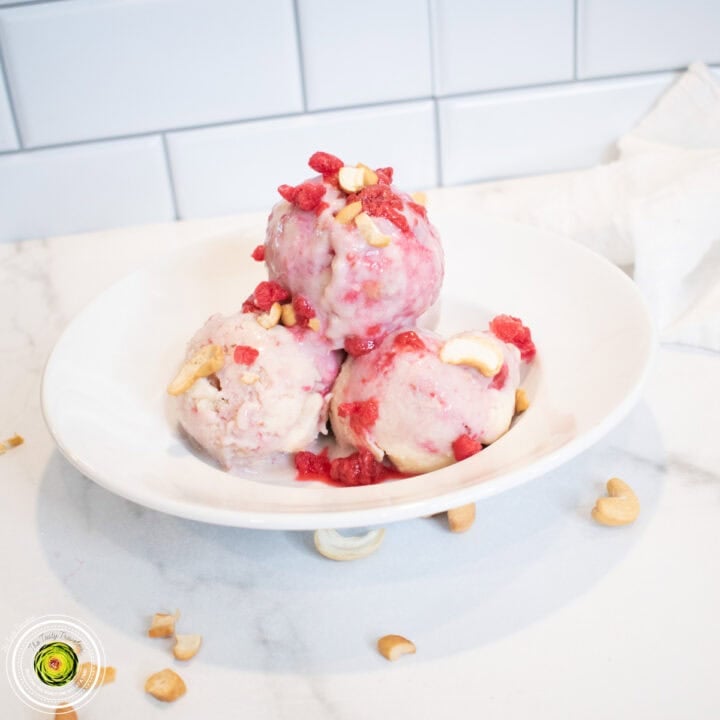
If you loved Baskin Robbins Baseball Nut ice cream as a kid, you have to try this Ninja Creami baseball nut protein ice cream. It’s a creamy vanilla base loaded with chopped cashews and homemade raspberry sauce throughout, and I promise you would never know it’s a protein ice cream. Jump to: Tips for making Ninja Creami Baseball Nut Protein Ice Cream Looking for more Ninja Creami Protein Ice Cream Recipes? Ingredient tips and substitutions Directions for Making the Ice Cream Mixture Directions for Processing the Ice Cream Mixture Save for Later on Pinterest! Recipe Comments Baseball Nut from Baskin […]

-
Ninja Creami Peach Cobbler Cottage Cheese Protein Ice Cream
I will be the first person to tell you that I HATE cottage cheese. I cannot stand the texture, the flavor, none of it. So when I tell you that this Ninja Creami Peach Cobbler Cottage Cheese Protein Ice Cream does not taste like cottage cheese, I mean it! I promise! This recipe comes in at 297.59 calories, 38.2 grams of protein, 21.11 grams of sugar, 4.23 grams of fat, and 27.68 grams of carbs for the ENTIRE pint. See the recipe card at the bottom of the post for all nutrition facts. Jump to: Tips for making Ninja Creami […]
-
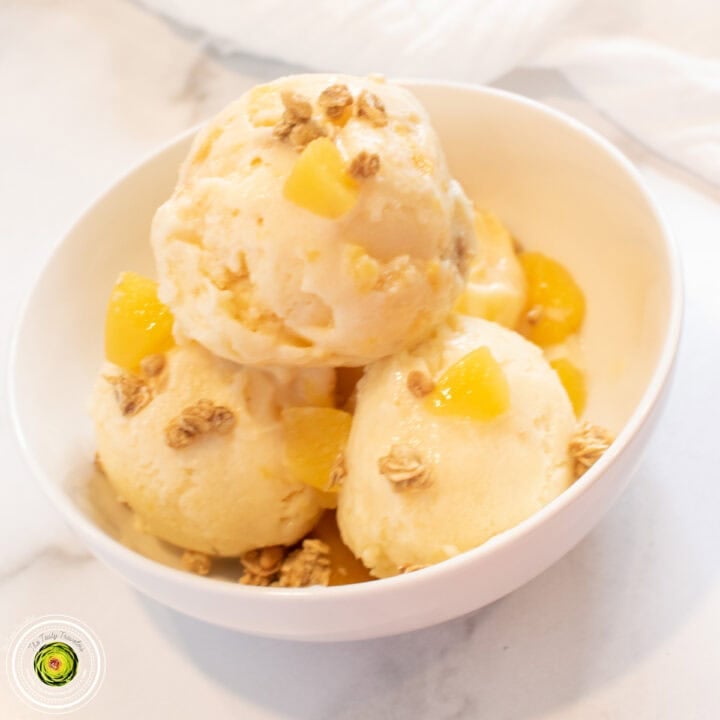
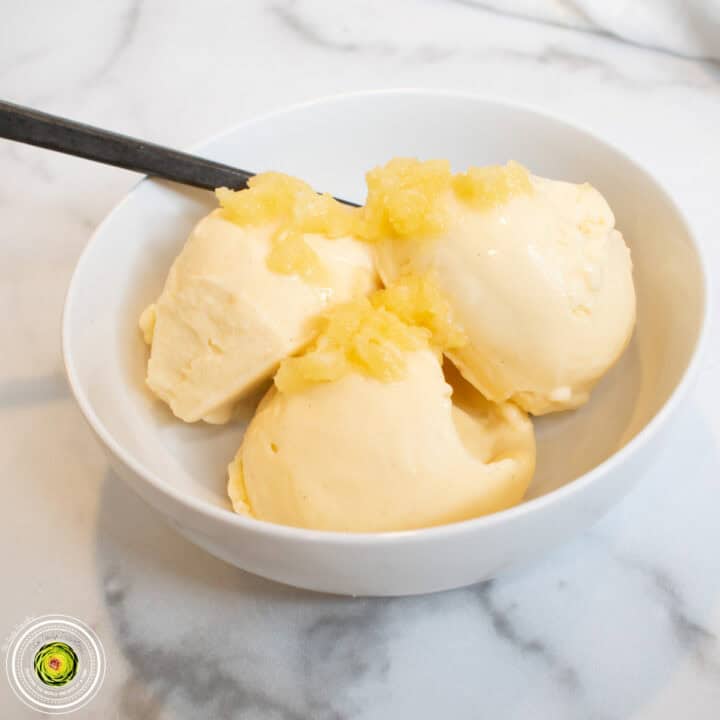
Ninja Creami Pineapple Dole Whip Protein Ice Cream
If you have ever had a Dole Whip at Disney World, you know how addicting they are. This Ninja Creami Pineapple Dole Whip Protein Ice Cream brings that same creamy pineapple flavor home, but with a TON of protein packed into the whole pint. Trust me, you would never know it’s a healthier version! This recipe comes in at 346.67 calories, 31.33 grams of protein, 24 grams of sugar, 3 grams of fat, and 47 grams of carbs for the ENTIRE pint. See the recipe card at the bottom of the post for all nutrition facts. Jump to: Tips for […]
-
Secret Ingredient to Make Coffee Ice Cream
If you want rich, bold coffee flavor in your Ninja Creami ice cream, instant espresso powder is the way to do it. No extra liquid, no fuss, and you can dial in exactly how much coffee flavor you want. Here’s everything you need to know. Why use instant espresso powder instead of brewed coffee? Brewed coffee is mostly water. Adding it to your Ninja Creami base means you’re adding liquid that can change the consistency of your recipe and water down the other flavors. Instant espresso powder is pure concentrated coffee flavor with no extra liquid. You get all the […]

-
Use Powdered Peanut Butter for More Flavor in Ninja Creami Recipes
If you want more peanut butter flavor in your Ninja Creami ice cream without adding on extra fat and calories, powdered peanut butter is a simple swap that delivers a richer, more concentrated peanut butter taste. Here’s why it works and how to use it. What is powdered peanut butter? Powdered peanut butter is made by pressing most of the fat out of roasted peanuts and grinding what’s left into a fine powder. What remains is concentrated peanut butter flavor with significantly less fat, fewer calories, and less sugar than regular peanut butter. It has the same nutty, roasted peanut […]
-
How Long Can You Freeze a Ninja Creami Base Before Processing?
Everyone knows that it’s recommended to freeze your Ninja Creami base for 24 hours before processing. But does it need to be frozen for exactly 24 hours? How long is too long, and does it actually matter if your Ninja Creami base has been sitting in the freezer for a week or more? Is there a maximum freeze time for Ninja Creami bases? Ninja does not publish an official maximum freeze time. The 24 hour minimum is well established, but there is no hard cutoff on the other end. Many people make their ice cream base with the intention of […]
-
How to Get Even More Vanilla Flavor in Your Ice Cream…
If you’ve been using vanilla extract in your Ninja Creami recipes and want to take the vanilla flavor up a notch, vanilla bean paste is the upgrade. Same effort, noticeably better results. What is vanilla bean paste? Vanilla bean paste is exactly what it sounds like. It’s a thick paste made from real vanilla beans. It contains the actual seeds scraped from inside vanilla bean pods, which is where the most intense vanilla flavor lives. When you use it in ice cream, you get those tiny black vanilla bean specks throughout the pint, along with a deeper, richer vanilla flavor […]


Jodi says
Do you think this could be made without the cream cheese?
Lauren Cardona says
Yes, you might need to add a little extra milk to make it creamier if you leave the cream cheese out.
Jodi says
I ended up making this with the cream cheese ( I was originally trying to make something that didn’t require a store run). It turned out really good. I felt it had more sauce than needed so next time I might use less of the sauce ingredients. I ended up adding some peas to mine (after cooking the dish) and I liked that addition.
Caitlin says
Very yummy, both my boyfriend and I loved this. Maybe going to try it with the lemon pepper wing sauce next time.
Angela says
Oh I bet that will be delicious!
Karri says
This dish was AMAZING 🥰 IM COOKING THIS WHEN .Y FATHER COMES IN TO VISIT NEX WEEK, MY DAUGHTER EVEN CUT UP SOME FRESH SPINACH IN IT… DEFINITELY A KEEPER!!!
Virginia says
Mine came out kind of soupy even without all the extra milk so I only put about 1/4 cup of it. Not sure why because I followed the measurements exactly. But nonetheless, it tasted delicious.
DeeAnn says
Same before I added anything after pressurizing there was so much water.
Kendra L Hay says
Can I use fully cooked pasta
Lauren Cardona says
Hi Kendra- If you use fully cooked pasta you should add it in at the end after pressure cooking. If you cook the pasta and then pressure cook it with the rest, it will turn to mush.
Megan says
Easy directions, SO delicious and easy. Added chard and smoked paprika, did mostly quick release after pressure cook 3 min. Sautéed chicken a bit longer because was sort of frozen still.
Tatjana says
Hi! Thanks for sharing! I did this crock pot w the wild wings sauce- it does have a kick! So I bought the Target version and it’s not AS tasty but no kick! I also used a little almost 2lbs of chicken tenders.
It was so yummy! Thanks again!
Dottie says
We love parmesan garlic sauce and this recipe sounds like it’s right up our alley. A full recipe would be too much for our family of 3. If I cut the recipe in 1/2, do you know if the cooking time in the instant pot would change?
TheTastyTravelers says
The cooking time would remain the same even if you cut the recipe in half. 🙂
Tiffany B says
Can I use boneless skinless chicken thighs instead of breast?
TheTastyTravelers says
Yes you can. But thighs take longer to cook, so either sauté it a little longer or cut the thighs into smaller pieces so that they cook all the way in the same amount of pressure cooking time.
Veronica says
It was delish. But I did change up a little. I seasoned the chicken w/ salt, garlic pepper and italian seasonings before browning. Pasta was nowhere near done, I used Penne. So I had to add extra broth(2C) and mushrooms to help finish noodles because it was burning to pan. After broth cooked down, noodles were done, probaly 5min, didn’t really time. Then I added the cream cheese, stirred a bit to start melting down, added heavy cream instead of milk and grated fresh parm and romano. I will make again, but just a little different next time🥰